Hacking the Tello drone

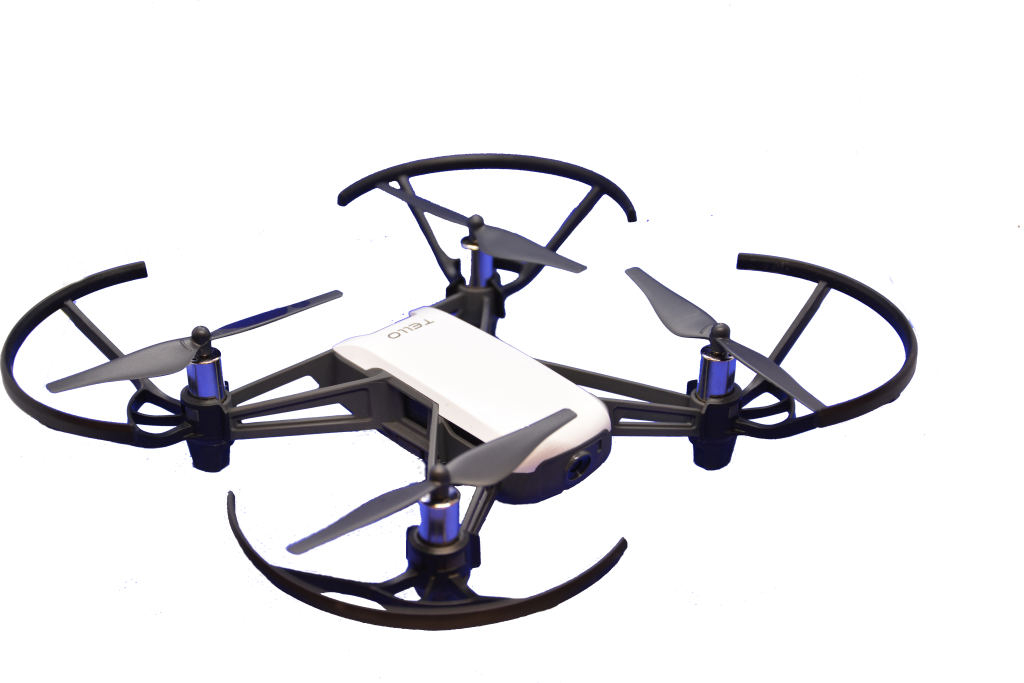
The Tello drone is a fun new toy that lets you go beyond the remote controls and hack it using an API.

My earlier experiences with remote controlled drones hasn’t been that great. To gain an expertise, they required more hand eye coordination and control than I was willing to devote to the hobby. So for me, Tello was a game changer. The price of the Tello drone with 2 additional batteries was a bit cheaper than: Sushi for two with a couple bottles of cold Saki.

The Tello is a stable drone responsive to your controls. You can launch it from the ground or toss it gently up into the air, where it hovers waiting for your next command. Tello uses it’s camera and internal Visual Positioning System (VPS) to provide aerial stability and smooth landings. Tello embeds the Intel Movidius Myriad 2 Video Processing Unit (VPU). The VPU handles object recognition, allowing the drone to respond to objects while in flight and hand gestures.

Tello has several builtin stunts such as: 8 different directions for flips, easy photo modes, lands into the palm of your hand, bounce mode and throw-and-go. The stunts are easy to run and are performed quite well by Tello.

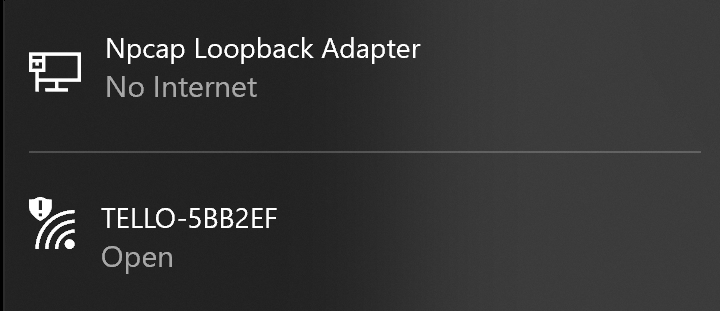
When Tello powers up it creates a wifi network which you connect to with your phone or other computer. Tello is controlled by sending it messages using UDP multicast. UDP is a faster protocol that TCP, at the expense of possibly losing some information. When the command and control information is sent continuously, a few lost packets are likely to be superseded by newer ones, negating the loss.

Tello drone
Tello drone

When you’re ready to move beyond the standard built in controls, you can hack Tello using the SDK provided by Ryzerobotics. To get started I watched a couple YouTube videos posted by Heliguy and HalfChrome. The videos will help you get started with the MIT Scratch2 programming lab, which uses a JavaScript module and NodeJS to interface with the Tello. Scratch is a great environments for kids learning to program and control Tello.

The SDK also includes a snippet of Python code which you can use to interact with Tello faster, with less heavy lifting. The Python code is the core interface from which larger applications can be written. The raw UDP socket interface example in Python can easily translate into other languages such as Go, Java, JavaScript and C/C++.

The SDK also gives some hints about creating a UDP server which can listen for live streaming video feed from Tello. I show the Python snippet below.

#
# Tello Python3 Control Demo 
#
# http://www.ryzerobotics.com/
#
# 1/1/2018

import threading 
import socket
import sys
import time
import platform  

host = ''
port = 9000
locaddr = (host,port) 


# Create a UDP socket
sock = socket.socket(socket.AF_INET, socket.SOCK_DGRAM)

tello_address = ('192.168.10.1', 8889)

sock.bind(locaddr)

def recv():
    count = 0
    while True: 
        try:
            data, server = sock.recvfrom(1518)
            print(data.decode(encoding="utf-8"))
        except Exception:
            print ('\nExit . . .\n')
            break


print ('\r\n\r\nTello Python3 Demo.\r\n')

print ('Tello: command takeoff land flip forward back left right \r\n       up down cw ccw speed speed?\r\n')

print ('end -- quit demo.\r\n')


#recvThread create
recvThread = threading.Thread(target=recv)
recvThread.start()

while True: 
    try:
        python_version = str(platform.python_version())
        version_init_num = int(python_version.partition('.')[0]) 
       # print (version_init_num)
        if version_init_num == 3:
            msg = input("");
        elif version_init_num == 2:
            msg = raw_input("");
        
        if not msg:
            break  

        if 'end' in msg:
            print ('...')
            sock.close()  
            break

        # Send data
        msg = msg.encode(encoding="utf-8") 
        sent = sock.sendto(msg, tello_address)
    except KeyboardInterrupt:
        print ('\n . . .\n')
        sock.close()  
        break

To run the code I connected my Windows 10 laptop to the Tello network.

Connect to Trello network
Connect to Tello network

After connecting to the network I ran the Python snippet, launched the Tello and safely landed.

You’ll find the commands in the Tello SDK Documentation. You can experiment capturing live video by sending Tello streamon, after you’re done capturing send the streamoff.

It took me a while to get this working. After a lot of failed experiments, I discovered my Windows 10 laptop was misdirecting the stream, even though wireshark showed it arriving on UDP port 1111. I was able to run ffmpeg without issues on Windows 7, capture the stream to an mp4 file and play it using VLC. This experiment is probably better done using Linux.

c:\> ffmpeg -i udp://0.0.0.0:11111 -vcodec libx264  output.mp4

In the next section I review what other ports I found open on Tello and looked at the packets exchanged using wireshark.

Here’s the results of an nmap scan of the Tello, showing an TCP connection on port 9999, which might be an abyss web server:

C:> nmap -Pn 192.168.10.1

Starting Nmap 7.80 ( https://nmap.org ) at 2019-12-29 10:08 Eastern Standard Time
Nmap scan report for 192.168.10.1
Host is up (0.025s latency).
Not shown: 999 closed ports
PORT     STATE SERVICE
9999/tcp open  abyss
MAC Address: 60:60:1F:**:**:**(SZ DJI Technology)

Nmap done: 1 IP address (1 host up) scanned in 25.66 seconds

I was able to connect from both my phone and laptop at the same time. In the process of doing so I launched Tello but wasn’t able to land (until the battery ran down). It seems I may have caused a problem sending commands from two locations?

Note the security advisory below:

If you’re playing in an area where vast amounts of beer are consumed, or around tech savvy buddies who enjoy messing with you, you might want to consider changing the WIFI SSID and adding a password to keep them out. See the app’s config section.

I hope this post gave you a good feel for the Tello and it’s capabilities. If I delve any deeper, it will probably be to code a UDP stream reader client using Go and record the live UDP video stream on my laptop.

Fixing annoying color scheme

When I start a terminal session on my Raspberry Pi some of the color schemes are downright annoying. Color can have the effect of eliciting feelings or invoking visceral reactions. The blue color against the black background makes my eyes water, burn and struggle to pull some form of discernible information from the dark void. Alas, mostly in vain.

The good news is that you don’t have to live with the default settings. Here’s an example of the defaults I get when logging in:

For me the dark blue is almost invisible. Linux allows you to configure different colors to represent directories, symbolic links, file types, etc. You can learn more by reading the manual page entry for dir_colors.

$ man dir_colors

To override the system settings you can create a file in your home directory called .dircolors. Start by setting this file to the default values. If you make a mistake or just want to get back to the default values you can remove this file.

$ dircolors -p > ~/.dircolors

If you edit this file, find the line that represents the color for directories and change it from Blue to Cyan.

# Change from BLUE
DIR 01;34 # directory

# change to CYAN
DIR 01;36 # directory

Once the change has been made you’ll need to log off and back in again, or reset the shell properties like this:

$ . ~/.bashrc

Another option might be to change all to values to a different theme like the solarize theme here:

$ wget -O .dircolors https://raw.githubusercontent.com/seebi/dircolors-solarized/master/dircolors.256dark
$
$ . ~/.bashrc
$ ls

For me the use of cornflower blue is more pleasing.

If you would like to get a better idea of what color values you might have available in the terminal, the colortest script is an excellent option. Running the script with the wide screen option will display the terminal color values which you can use as a guide.

Having a better handle in the colors of files, folders and the like there’s also the prompt string to consider. Changing the values in the prompt string is fairly straight forward. The values for PS1 are found in your .bashrc file. Here’s some examples below:

$ # Set prompt string to no colors
$ PS1='${debian_chroot:+($debian_chroot)}\u@\h:\w\$ '
$ 
$ # Annoying Blue directory color
$ PS1='${debian_chroot:+($debian_chroot)}\[\033[01;32m\]\u@\h\[\033[00m\]:\[\033[01;34m\]\w \$\[\033[00m\] '
$
$ # Cyan directory color
$ PS1='${debian_chroot:+($debian_chroot)}\[\033[01;32m\]\u@\h\[\033[00m\]:\[\033[01;36m\]\w \$\[\033[00m\] '

That should do it for the basics, I hope you enjoyed this post!

Getting started with the G007 Spy Camera

For Christmas of 2019 I purchased the G007 Spy Camera from Sir Gawain, both to tinker with and to impress upon my grand kids how small, discreet and pervasive surveillance has become.

I enjoy reading the reviewer comments to get ideas on how others are using the G007. A gal posted in a review – she was suspicious her roommates might have been taking her things. She set up the camera for motion recording overnight. In the morning the evidence was there, someone was taking her things! Sure enough her cat had been stockpiling her loot. The compelling video evidence solved the caper and put her mind to rest.

It’s become a habit of mine to download product manuals as PDF’s, especially when they’re small and easy to lose like this one is. It also makes it easier to find the instructions when I need them in the future. The Sir Gawain website makes the download easy, if you visit the Support page there’s a link where you can download the product manual. In the sections that follow, I thought i’de review the different G007 modes of operation that I found a bit confusing the first few times I read them.

The instructions were a little confusing for me when reviewing the various modes of operation. I’ve added some additional pointers below in the hope that they may be of help to others who may have had a similar experience. If you have any suggestions based on your own experiences to help make the getting started process better please let me know.

I’ve not tried any of their other spy gadgets, though the Spy Pen looked like it may have been inspired by a James Bond thriller, made by Q Department. Spies, counter spies, counter counter spies … it’s an opaque world where one is ever really sure whats going on!

I purchased my G007 Spy Camera on Amazon from Sir Gawain.

The G007 is quite small, 3/4″ cubed and has some nifty features including:

  • Infrared night vision
  • Motion detector to trigger video capture
  • High definition 1080 pixel or 720 pixel
  • Photo snapshots at 12MP
  • Loop recording

I find the lack of Bluetooth and Wifi support tends to lead to a few more manual steps than would otherwise be required. It would be nice if a future version might find a way of including them without impacting the price. Another feature on my wish list would be to integrate Night Vision mode with the Motion Sensor.

Power Up

To turn on the camera depress the power button for about 3 seconds. The camera will display a Blue light and power up into 720P video mode. To change between the different Video and Camera modes, press the mode button again. The camera displays a Blue and Red light and changes into 1080P HD video mode. Press the Mode button again, the camera displays a Red light and changes into 12M Photo mode. If you press the Mode button again the camera goes back to 720P video mode where this cycle repeats.

First and foremost, be sure you pay close attention to the LED lights near the Mode button while looking down at the top of the camera. You’ll notice different combinations of Red, Red and Blue and Blue lights to let you know what mode the camera is in.

Once you’re in a Mode, you can start a video recording or snap a picture by pressing the Power button. The light flashes 3 times, goes out. When in Video mode, recording begins. To stop a Video recording press the Power button again. For automatic recordings you can use the motion Detection mode described below.

Setting the Date and Time

I’ve included this step near the top, because all your Video’s and Photo’s will have the wrong timestamp until you correct the Date and Time settings. The instructions describe how to properly configure the Date and Time by editing a file created on your MicroSD card when you first Power Up.

Go ahead and Power Down the G007 and fix the Date and Time setting.

Power Down

To turn the camera off depress the power button for about 9 seconds until the light goes out.

To enable the motion detector mode or night vision (IR photography), start the camera into one of the Video or Camera modes described above.

Note: To start a recording in Motion Detector mode i’ve only been able to use video mode 720P or 1080P. Photo shooting doesn’t work for me. This seems reasonable to me, but doesn’t state this clearly in the manual.

Night Vision Mode

To enter night vision mode depress the Power button for about 3 seconds and let go. You should see the LED light flash 3 times. The manual suggests using your phone camera to look at the IR lights in from of the G007 camera, with my phone I can see the IR lights turned on.

Like with the other modes above, you start and stop recordings by momentarily pressing the Power button.

To turn off night vision mode, depress the Power button for 3 seconds and let go. You should notice the LED blink 3 times.

Motion Detection Mode

You can save the cameras lithium battery life by using motion detector mode. The battery is rated at approximately 70 minutes, but i’m sure that depends on use.

To enter motion detector mode select one of the two video modes, depress the Mode button for 3 seconds and keep pressed until you see the LED blink 3 times, then let go.

When you’re in motion detector mode the camera will record when motion is detected. In my experiences, i found that the camera records about a 2 minute length of video. I’ve not yet tried to see what happens when a subject remains in the motion field after 2 minutes. I would guess that the recording turns off after there’s no motion for 2 minutes, but haven’t confirmed this yet.

To get out of motion detection mode simply press the Power button.

Extending Recording time

If you would like to extend battery life you might consider and external battery or power source. Here’s a photo of my external solar charged battery rated at 4000mAh:

AllPowers 4000mAh

With the external battery I found I can run the camera the entire night with Motion Detection Mode enabled. Perhaps in another experiment I can let you know how many days it can run on external battery … but for now i’ll wrap this post up.

I hope you found this article helpful. In a future post i’de like to show results of some IR photography and perhaps some experiments integrating the camera with a Raspberry Pi.

Distinct properties in Mule runtime environments

There’s several ways of propagating properties in Mule deployments based on the environment Mule is running in. Typically we find our projects having at least a Dev, Text and Prod environment, sometimes you may have more like Stage, Perf and others. The property approach follows the same pattern no matter how many differing environments you may need to support.

Property environments may come in through the OS environment or through the runtime wrapper.conf file. The wrapper.conf properties are available to all Mule projects deployed in the runtime environment.

To use a system environment variable to read your property file based on the environment, you might use an approach similar to the one shown below.

<!-- 
  Use environment variable to specify the runtime property file to use
  For DEV, TEST, PROD your OS env would configure in a similar fashion
    export RUNTIME_ENV=DEV

  and, your src/main/resources would contain:
    config.DEV.properties
    config.TEST.properties
    config.PROD.properties
-->
<context:property-placeholder location="config.${RUNTIME_ENV}.properties" />

You would follow a similary approach if using a YAML rpoperty files instead of a flat name/value property file. In another post i’ll describe how private values are protected in the property file using secure property placeholders.

There are time where you might prefer generating project property files at build time. In this case you would implement profiles in your Maven pom.xml file similar to the example below.

<!-- Add your nexus repo -->
<distributionManagement>
<repository>
	<id>cms-nexus</id>
	<url>https://nexus.com/nexus/repository/cms-maven2/</url>
</repository>
</distributionManagement>

<profiles>

  <profile>
	<id>dev</id>
	<properties>
	  <profile-id>DEV</profile-id>
	</properties>
	<build>
	<plugins>
	  <plugin>
		<artifactId>maven-antrun-plugin</artifactId>
		<executions>
		  <execution>
			<phase>test</phase>
				<goals>
				  <goal>run</goal>
				</goals>
				<configuration>
				  <tasks>
					<delete file="${project.build.outputDirectory}/config.DEV.properties" />
					<copy file="src/test/resources/config.DEV.properties"
						tofile="${project.build.outputDirectory}/mulish.properties" />
					<copy file="src/test/resources/config.DEV.properties"
						tofile="${project.build.outputDirectory}/consumer.properties" />
				  </tasks>
				</configuration>
		  </execution>
		</executions>
	  </plugin>
	</plugins>
	</build>

  </profile>
  <profile>
	<id>testenv</id>
	<properties>
		<profile-id>testenv</profile-id>
	</properties>

	   ...
	   
	</build>
  </profile>
</profiles>

   ...

In the example above, when maven build the project archive you would specify the environment you would like to have the property file configured for. If building for DEV you would do something like the following:

# the -P flag specifies the Profile
mvn package -P DEV

The maven profile will delete the default property file and copy the property file for the runtime environment into it’s place. The property files for each environment in this example are kept in the folder src/test/resources. The reason for this is to prevent property files from other environments from being copied into the runtime package file.

I hope you’ve enjoyed this POST on property management in Mule and look forward to your feedback.

Cross compile for Raspberry Pi

I wanted to try cross compiling gotop for the Raspberry Pi 4 using my Windows 10 Laptop. It threw me an error (Yikes!):

logging_other.go:11:2: undefined: syscall.Dup2

The day was growing late and I needed to get some grilling done. So I decided instead (for now) to go get it, build, and install on my Pi 4 and play with a simpler task, cross compiling for the ARM processor.

Update on the earlier error above (12/19) – To get around the Linux syscall error when cross compiling on Windows 10, run your go build in a GIT Bash (or equivalent) shell.

# go get gotop locally on my Pi 4
go get github.com/cjbassi/gotop

go build

go install

# See it running below

Here’s gotop, showing load across 4 CPU Cores, memory and process utilization. If you type the ‘?’ it will show you the key bindings, and if you know vim most of them will be familiar to you.

Now that I have gotop up and running (I hope to use it to see how loaded it gets using picamara in a VNC session), i’ll show the important parts of cross compiling from Windows 10 to the Pi 4.

Here’s a simple hello world that we’ll cross compile, I call the file howdy.go:

package main

import "fmt"

func main() {
	fmt.Println("Howdy do")
}

The Pi 4 uses an ARM 7 processor, but you can check by running the uname command.

uname -a

Linux my-host 4.19.75-v7l+ #1270 SMP Tue Sep 24 18:51:41 BST 2019 armv7l GNU/Linux

Compile the sample howdy.go for Linux specifying the ARM 7 processor:

REM Compile for ARM 7 processor
c:> env GOOS=linux GOARCH=arm GOARM=7 go build

REM copy to Pi4
scp howdy pi@my-host:~/

Give it a run on your Pi 4, making sure the permissions are good to run it.

chmod 755 howdy

./howdy

I hope you found this post both practical and interesting!

Importing components into Mule

Bootstrapping component technologies into Mule can be accomplished using Spring beans. In the example below we demonstrates how to pull in Mule flows from a common component and changing the behavior of database caching to utilize C3P0.

The import-resource XML stanza looks on the classpath for a resource named common-flows.xml. In our case, the common flows are a set of Mule flows which are used across a number of different projects. They’re built separately and pushed to Nexus in a Jar file, which is included by other Mule projects that have a need for the common functions.

The C3p0 bean Id demonstrates an example of how we would override the default database pooling strategy, replacing it with C3p0 which offers better reliability and control. Like the earlier common jar example, the Jar file is pulled into our project by the Java class loader and the Bean is pulled into our project.

<spring:beans>
    
  <spring:import resource="classpath:common-flows.xml"/>

  <spring:bean id="C3p0_snf_metadataPooledDataSource" 
    name="C3p0_snf_metadataPooledDataSourceBean" 
	class="com.mchange.v2.c3p0.ComboPooledDataSource">
	
	<spring:property name="driverClass" value="com.mysql.jdbc.Driver"/>
	
	<!-- Pooling -->
	<spring:property name="minPoolSize" value="${mysql.minPoolSize}"/>
	<spring:property name="maxPoolSize" value="${mysql.maxPoolSize}"/>
	<spring:property name="maxIdleTimeExcessConnections" value="600"/>
	
	<!-- Administrative -->
	<spring:property name="dataSourceName" value="my_dsn"/>
	<spring:property name="user" value="${mysql.username}"/>
	<spring:property name="password" value="${mysql.password}"/>
	<spring:property name="jdbcUrl" value="${mysql.url}"/>
	
	<!-- How long to wait for a connection -->
	<spring:property name="checkoutTimeout" value="10000"/>
	
	<!-- These setting control what to do if/when 
	     we get a database connection failure -->
	<spring:property name="acquireRetryAttempts" value="30"/>
	<spring:property name="acquireRetryDelay" value="10000"/>
	<spring:property name="breakAfterAcquireFailure" value="false"/>
	
	<!-- These settings control how to test existing connections -->
	<spring:property name="preferredTestQuery" value="select 1"/>
	<spring:property name="testConnectionOnCheckout" value="true"/>
	
  </spring:bean>
		
</spring:beans> 
    

To add a custom function to Mule expressions you would define them in the global functions tag. The example below shows how you might incorporate a Base 64 decoder.

<configuration doc:name="Configuration">
  <expression-language>
	  <global-functions file="other_functions.mvel">
				   
		def decode(value) {
			return java.util.Base64.getDecoder().decode(value);
		}
				   
	  </global-functions>
  </expression-language>
</configuration>

Having defined the decode function we can now use it in our flows like this:

<set-variable variableName="CLAIM_DECODED" value="#[new String(decode(flowVars.JWT_CLAIMS))]" doc:name="Decode"/> 

In the snippet above, we show how the decode statement invokes our custom expression which converts the Base 64 encoded field to String.

API Health check

Micro service API’s need a way of providing liveness events to Clients and Gateway applications. Application frameworks such as Spring Boot provide mechanisms for enabling Health Check implementation automatically through the Actuator.

In Mulesoft a simple mechanism like the one below can be added to a common layer and reused in your API’s.

    <flow name="health-check">
          <http:listener config-ref="HTTP_API_Listener" path="/health" doc:name="HTTP">
            <http:response-builder statusCode="200" reasonPhrase="Health check success!"/>
          </http:listener>

          <set-payload value="Micro Service on #[InetAddress.getLocalHost().getHostName()] reply: ... Success." doc:name="Set Payload"/>
    </flow>

The Health check request invoked from the Browser, CURL or other tools like Httpie will timeout if the micro service is unavailable, or respond with the HTTP Header and content similar to below.

$ curl https://myhost.com/health

HTTP/1.1 200 Health check success!
Content-Length: 74

reply: ... Success.

Health checks are an integral component to API Gateways in determining service availability.

Another handy feature to consider, is to bake into your micro service the ability of responding with a static example if for example, an HTTP query term like test is added to the inbound request.

The example below shows a qualifier you might add to a Choice statement ans well as a static responder that might return a JSON response.

<!-- sample query term to direct the production of a static sample response -->
message.inboundProperties.'Mule-Route' == 'test'

<!-- static page responder -->
<set-payload value="#[Thread.currentThread().getContextClassLoader().getResourceAsStream('POST-Page02-200.json')]" doc:name="Post Document"/>
<set-variable variableName="RESPONSE_STATUS" value="#[201]" doc:name="Status"/> 

The response you return in the file POST-Page02-200.json above would be a static JSON response which client applications can use as a Mock implementation of the interface contract.

{
  "Item": "Neural Compute Stick 2",
  "Quantity": "42",
  "Color": "CyberBlue",
  "Accelerators": [ "CPU", "GPU", "VPU", "FGPA"]
}

We hope you found this short tutorial interesting and wish you the best in your endeavors.

Playing with Boto in AWS

In this post we’ll go over a few common commands for interacting with AWS S3 and SQS using Python Boto. These were pulled from the pages of my Jupiter notebook and have been valuable in jump stating new projects.

Lets start with an example for listing all S3 buckets:

import boto3

s3 = boto3.resource('s3')

# print out bucket names
for bucket in s3.buckets.all():
    print (bucket.name)

In this example we’ll again list the buckets, but using the client API:

import boto3

s3 = boto3.client('s3')
response = s3.list_buckets()

# print the bucket names
for bucket in response['buckets']:
    print(f' {bucket["Name"]}')

So much for bucket list examples, now lets upload a file to S3:

import boto3

s3 = boto.resource('s3')
data = open('Duff_Beer.png', 'rb')
s3.Bucket('your-aws-bucket').put_object(Key='Duffer.png', Body=data)

Using the examples above as a pattern you can easily extend to include the other CRUD operations.

We turn now to some basic SQS operations:

import boto3

boto3.setup_default_session(profile_name='sqs')
sqs = boto3.resource('sqs')

# list and print SQS names
for queue in sqs.queues.all():
    print(queue.url)

Here’s how you would go about creating a Queue instance:

import boto3

boto3.setup_default_session(profile_name='sqs')
sqs = boto3.resource('sqs')

# create queue
queue = sqs.create_queue(QueueName='test', Attributes={'DelaySeconds': '5'})

# send a message
response = queue.send_messages(Entries=[
    {
        'Id': '1',
        'MessageBody': 'Howdy from your pal Boto3'
    },
    {
        'Id': '2',
        'MessageBody': 'Boto3 would like to know if you have plans for this eve',
        'MessageAttributes': {
             'Author': {
                 'StringValue': 'A. Piker',
                 'DataType': 'String'
             }
        }
    }
])

Reading the SQS message:

import boto3
from datetime import datetime

boto3.setup_default_session(profile_name='sqs')
sqs = boto3.resource('sqs')

queue = sqs.get_queue_by_name(QueueName='test')

queue.load()
messages = queue.receive_messages(
    QueueUrl=queue.url,
    AttributeName=[
        'SentTimeStamp', 'Author', 'Id'
    ],
    MaxNumberOfMessages=9,
    MessageAttributeNames=[
        'All'
    ],
    VisibilityTimeout=300,
    WaitTimeSeconds=0
)
# print messages
for message in messages:
    print(f'SQS Message: \n\t {message.body'})
    message.delete()

# some other handy debug and cleanup helpers
print(queue)

resp = clt.get_queue_attributes(QueueUrl=queue.url,
    AttributeNames=['ApproximateNumberOfMessages', 'LastModifiedTimestamp'])

print(resp)

print(clt.purge_queue(QueueUrl=queue.url)

print(clt.delete_queue(QueueUrl=queue.url)

I hope these examples serve to spark your curiosity and help guide you to realize the ease and simplicity of AWS SDK integration using Boto.

dpi Aware tkinter

To make your Windows 10 tkinter applications have a pleasant look and feel when running in that environment you’ll have to enable DPI aware, here’s how:

# win10 dpi aware
try:
    from ctypes import windll
    windll.shcore.SetProcessDpiAwareness(1)
    print('Win10 Aware')
except:
    pass

This was a short how-to, but hopefully helpful. We look forward to enriching the content with useful examples.


16 Dec 2019 – HowTo make SoapUI 5.2.1 DPI Aware

Not sure if I should make this a more general post on DPI Aware findings, for now I will …

I’m still running SoapUI v 5.2.1 on my Windows 10 laptop and had forgotten how I set it up to be DPI Aware. More recent versions resolve this problem and won’t require this fix described here.

REM First configure a Registry DWORD here
HKEY_LOCAL_MACHINE\SOFTWARE\Microsoft\Windows\CurrentVersion\SideBySide\PreferExternalManifest

REM set DWORD=1
PreferExternalManifest=1

Next create a manifest file in the same directory as SOAP UI.exe called SoapUI-5.2.1.exe.manifest.

<?xml version="1.0" encoding="UTF-8" standalone="yes"?>
<assembly xmlns="urn:schemas-microsoft-com:asm.v1" manifestVersion="1.0" xmlns:asmv3="urn:schemas-microsoft-com:asm.v3">
    <description>eclipse</description>
    <trustInfo xmlns="urn:schemas-microsoft-com:asm.v2">
        <security>
            <requestedPrivileges>
                <requestedExecutionLevel xmlns:ms_asmv3="urn:schemas-microsoft-com:asm.v3"
                    level="asInvoker" ms_asmv3:uiAccess="false">
                </requestedExecutionLevel>
            </requestedPrivileges>
        </security>
    </trustInfo>
    <asmv3:application>
        <asmv3:windowsSettings xmlns="http://schemas.microsoft.com/SMI/2005/WindowsSettings">
            <ms_windowsSettings:dpiAware xmlns:ms_windowsSettings="http://schemas.microsoft.com/SMI/2005/WindowsSettings">false</ms_windowsSettings:dpiAware>
        </asmv3:windowsSettings>
    </asmv3:application>
</assembly>

That will do the trick, V5.2.1 will become DPI Aware.