
Application versions
The code used in this article is running the following versions:
- etcd Version: 3.5.0-pre
- etcd Git SHA: 45156cf3c
- Go Version: go1.11.6
- Go OS/Arch: linux/arm
Known caveats
- None observed at this time
Etcd is a distributed Key/Value store written in the Go programming language. When you need a simple, highly performant, secure, scalable solution for managing data in a cluster etcd is a top contender. Technologies such as: Kubernetes, CoreDNS and openstack (to name a few) depend on etcd for managing state in their cluster.
The etcd depends on the Raft consensus algorithm for leader election and the sharing of state between cluster members. Should a failure occur, a new leader is elected and the distributed key/value store resumes operations. When configured properly, users shouldn’t be aware of any disruptions.
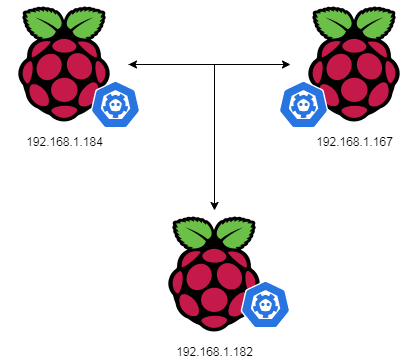
In the example below we’re going to install etcd on the Raspberry Pi configuration below.
CLI interactions with etcd depend on the etcdctl application. The etcdctl has several commands for managing the etcd cluster. We’ll use just a few basic commands in our setup below.
The Raspberry Pi ARM7 processor isn’t an approved platform for running etcd. If you’re like me and just want to play with etcd, you probably don’t care.
To install etcd on Raspberry Pi, I followed the instructions here for installing from the latest Github branch. As I have Go installed on my Pi, I attempted to run go get, but encountered several errors with packages required by the CLI control program. Next I tried the git clone and ./build which ran successfully, creating ./bin/etcd and ./bin/etcdctl.
Before running etcd you will need to set an environment variable ETCD_UNSUPPORTED_ARCH or you will get the following error:
# Without setting envvar on unsupported architecture etcd will stop
$ etcd
etcd on unsupported platform without ETCD_UNSUPPORTED_ARCH=arm set
Set the environment variable and you should be able to run etcd.
# set envvar
$ export ETCD_UNSUPPORTED_ARCH=arm
# check for version and note the warning about: unsupported architecture
$ etcd --version
running etcd on unsupported architecture "arm" since ETCD_UNSUPPORTED_ARCH is set
etcd Version: 3.5.0-pre
Git SHA: 45156cf3c
Go Version: go1.11.6
Go OS/Arch: linux/arm
Now we get get on with the cluster configuration on each Raspberry Pi. We’ll configure each Pi by setting environment variables to identify each host in the cluster.
# Cluster configiguration
TOKEN=token-01
CLUSTER_STATE=new
NAME_1=viper
NAME_2=cobra
NAME_3=sidewinder
HOST_1=192.168.1.167
HOST_2=192.168.1.184
HOST_3=192.168.1.182
CLUSTER=${NAME_1}=http://${HOST_1}:2380,${NAME_2}=http://${HOST_2}:2380,${NAME_3}=http://${HOST_3}:2380
With the environment variables configured for each cluster we can now start the etcd running on each. Be sure to choose the target specific section below for each Raspberry Pi cluster member.
# For machine 1
THIS_NAME=${NAME_1}
THIS_IP=${HOST_1}
etcd --data-dir=data.etcd --name ${THIS_NAME} \
	 --initial-advertise-peer-urls http://${THIS_IP}:2380 \
	 --listen-peer-urls http://${THIS_IP}:2380 \
	 --advertise-client-urls http://${THIS_IP}:2379 \
	 --listen-client-urls http://${THIS_IP}:2379 \
	 --initial-cluster ${CLUSTER} \
	 --initial-cluster-state ${CLUSTER_STATE} \
	 --initial-cluster-token ${TOKEN}

# For machine 2
THIS_NAME=${NAME_2}
THIS_IP=${HOST_2}
etcd --data-dir=data.etcd --name ${THIS_NAME} \
	 --initial-advertise-peer-urls http://${THIS_IP}:2380 \
	 --listen-peer-urls http://${THIS_IP}:2380 \
	 --advertise-client-urls http://${THIS_IP}:2379 \
	 --listen-client-urls http://${THIS_IP}:2379 \
	 --initial-cluster ${CLUSTER} \
	 --initial-cluster-state ${CLUSTER_STATE} \
	 --initial-cluster-token ${TOKEN}

# For machine 3
THIS_NAME=${NAME_3}
THIS_IP=${HOST_3}
etcd --data-dir=data.etcd --name ${THIS_NAME} \
	 --initial-advertise-peer-urls http://${THIS_IP}:2380 \
	 --listen-peer-urls http://${THIS_IP}:2380 \
	 --advertise-client-urls http://${THIS_IP}:2379 \
	 --listen-client-urls http://${THIS_IP}:2379 \
	 --initial-cluster ${CLUSTER} \
	 --initial-cluster-state ${CLUSTER_STATE} \
	 --initial-cluster-token ${TOKEN}
When you’ve verified that each cluster member is running correctly, you’re ready to create a Key/Value pair which will be published to the cluster.
Be sure to configure the environment variables needed by etcdctl on each Raspberry Pi in the cluster.
# configure environment for etcdctl on each host
export ETCDCTL_API=3
HOST_1=192.168.1.167
HOST_2=192.168.1.184
HOST_3=192.168.1.182
ENDPOINTS=$HOST_1:2379,$HOST_2:2379,$HOST_3:2379

# publish key/value pair
$ etcdctl --endpoints=$ENDPOINTS put foo bar
You can now verify the key/value pair is available on each cluster member.
$ etcdctl --endpoints=$ENDPOINTS get foo
foo
bar
With our custer running we can perform some simple operations. Here are some examples:
Watch a key while changing it’s value in another shell terminal.
# While watching foo, we change it's values in another shell
$ etcdctl --endpoints=$ENDPOINTS watch foo
PUT
foo
19.42
PUT
foo
buzz
Here’s some other interesting commands for you to try:
# Display cluster members formatted in a table
$ etcdctl --endpoints=$ENDPOINTS --write-out=table member list

# Display an entry as JSON, K/V is base64 encoded
$ etcdctl --endpoints=$ENDPOINTS --write-out=json get foo

# Display endpoint stats formatted in a table
$ etcdctl --endpoints=$ENDPOINTS --write-out=table endpoint status

# Take a point in time snapshot of a members state
$ FOR_ENDPOINT=192.168.1.182
$ etcdctl --endpoints=$FOR_ENDPOINT:2379 snapshot save my-snap.db
$ etcdctl --endpoints=$FOR_ENDPOINT:2379 --write-out=table snapshot \
    status my-snap.db
+----------+----------+------------+------------+
|   HASH   | REVISION | TOTAL KEYS | TOTAL SIZE |
+----------+----------+------------+------------+
| 3090b765 |        5 |         10 |      20 kB |
+----------+----------+------------+------------+
You can also send a JSON message to the cluster. Since version 3, the etcd API protocol uses grpc, so JSON requests will proxy through a grpc gateway. The grpc messages are byte arrays and marshal in base64 encoded format. The example below sends a JSON request through the gateway. You can use curl from Linux, or may prefer httpie if you have Python installed.
# send command to grpc gateway using httpie
#   install with pip:  pip install httpie
# the key: foo, base64 encoded is: Zm9v
$ http POST 192.168.1.182:2379/v3/kv/range key=Zm9v

# using curl you would wend the same command like this
$ curl -L http://192.168.1.182:2379/v3/kv/range \
    -X POST -d '{"key": "Zm9v"}'

# results will look like this
{
    "count": "1",
    "header": {
        "cluster_id": "8542102317057920171",
        "member_id": "12973437254233312577",
        "raft_term": "72",
        "revision": "5"
    },
    "kvs": [
        {
            "create_revision": "2",
            "key": "Zm9v",
            "mod_revision": "5",
            "value": "YnV6eg==",
            "version": "3"
        }
    ]
}
As you can see, the cluster is now configured and ready for more complex operations. I hope you’ll stay tuned for an upcoming post!
Mitch Dresdner
Mitch enjoys tinkering with tech across a wide range of disciplines. He loves learning new things and sharing his interests. His work interests run the gamut of: application integration, scalable secure clusters, embedded systems, and user interfaces. After hours you might find him dabbling in the hobby space with Raspberry Pi's, drones, photography, home wine making and other ferments.