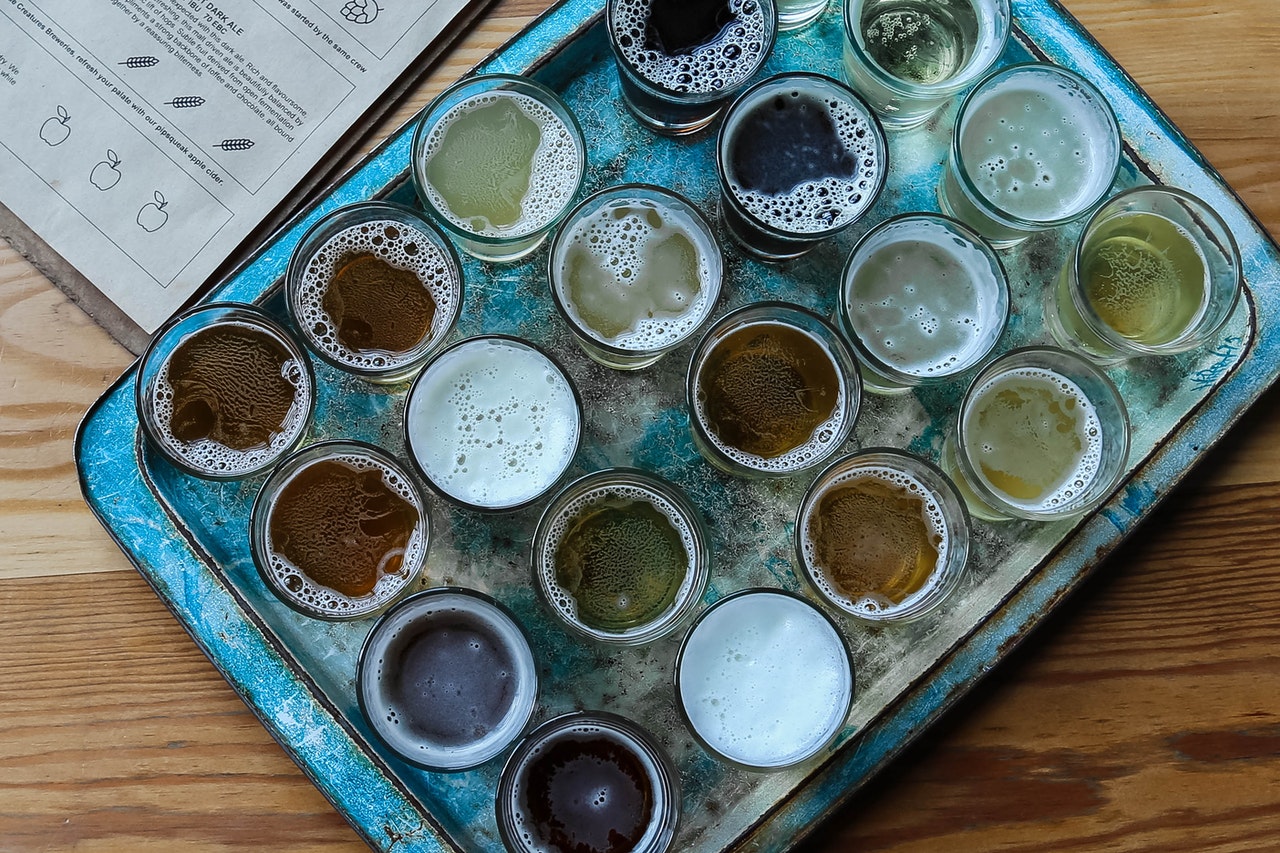
It’s an easy new hobby to pick up, share with your friends and make some new ones!
Being curious by nature, i’m always on the lookout for new hobbies, especially those with a low barriers to entry. Having dabbled a bit with Home Wine making, Artisan Breads and some other ferments, Craft Brewing seemed to be within my realm of possibilities.
I set a goal for myself, to minimize the startup cost by reusing the wine making equipment I already had and to give brew making a try using an all inclusive ingredients kit. Who knows, maybe I’de get bored too quickly or turn out to be a really bad brew meister. No sense making extravagant investments in new equipment too soon. If all went well, there’ll be time to rethink this, better off procrastinating new equipment decisions till later.
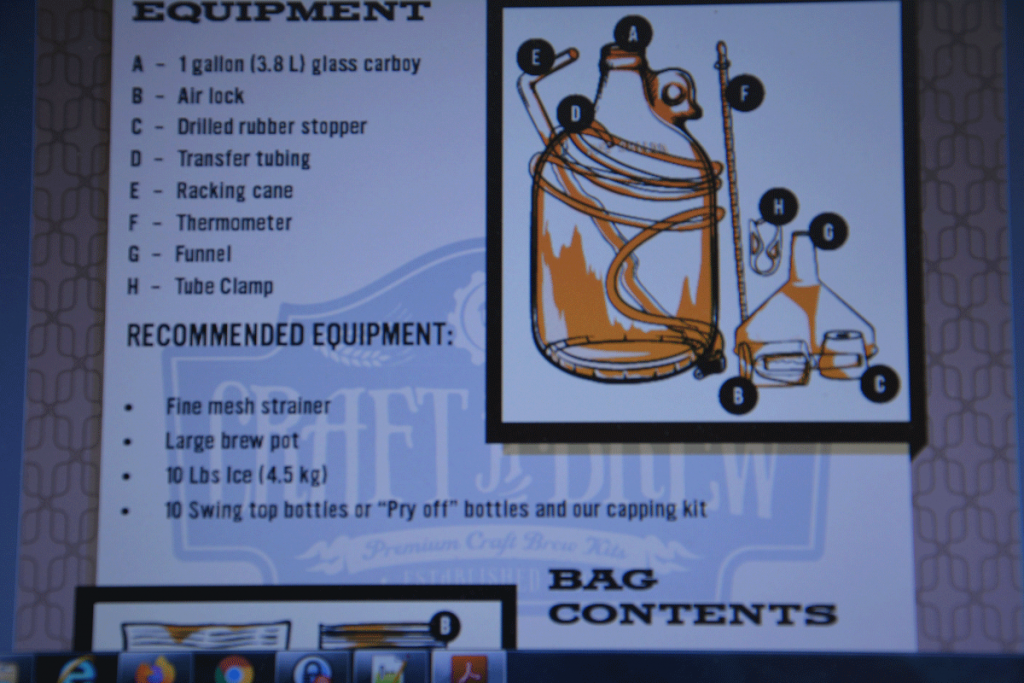
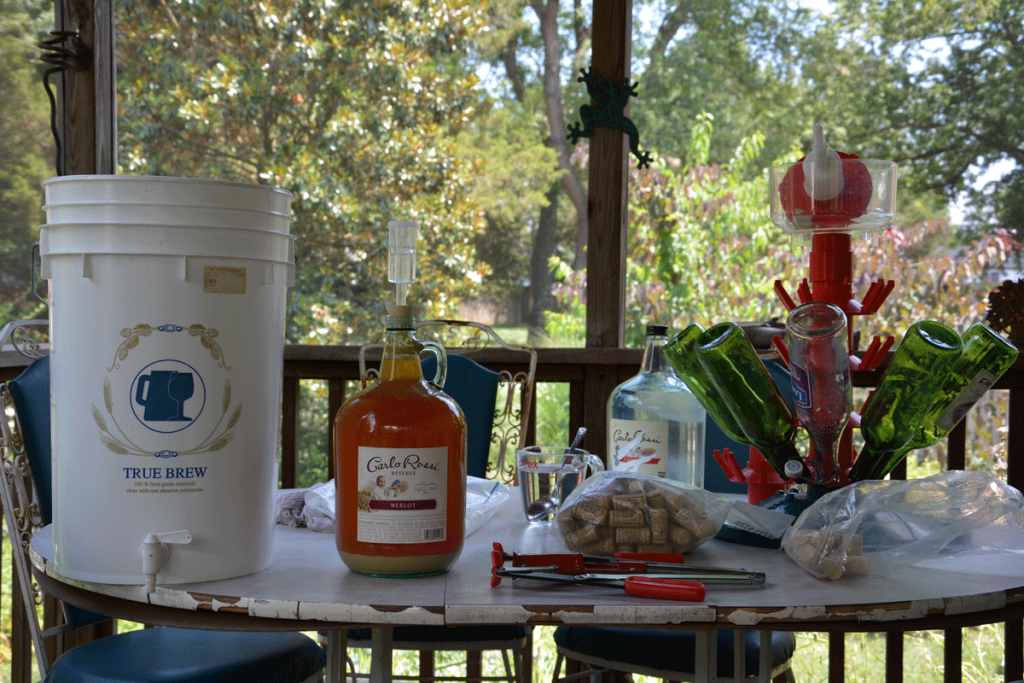
Most brew kits cover all the details you’ll need to know about the equipment that’s needed and they provide a simple recipe for you to follow. It mostly comes down to keeping clean of micro organisms and following the basic recipe. The basic stuff you’ll need is shown in steps B-G below and can be purchased at the local brew store or on-line for around $10. If this is your first brew, I’d say the thermometer is optional and will have more to say about the carboy later.
Having settled the equipment problem, I searched the internet for a cheap-but-good recipe kit and decided on the one below from Craft a Brew. These folks do an awesome job of putting together everything you need to make great beers by following a simple recipe. For beginners like me or the seasoned veterans this is a huge advantage.
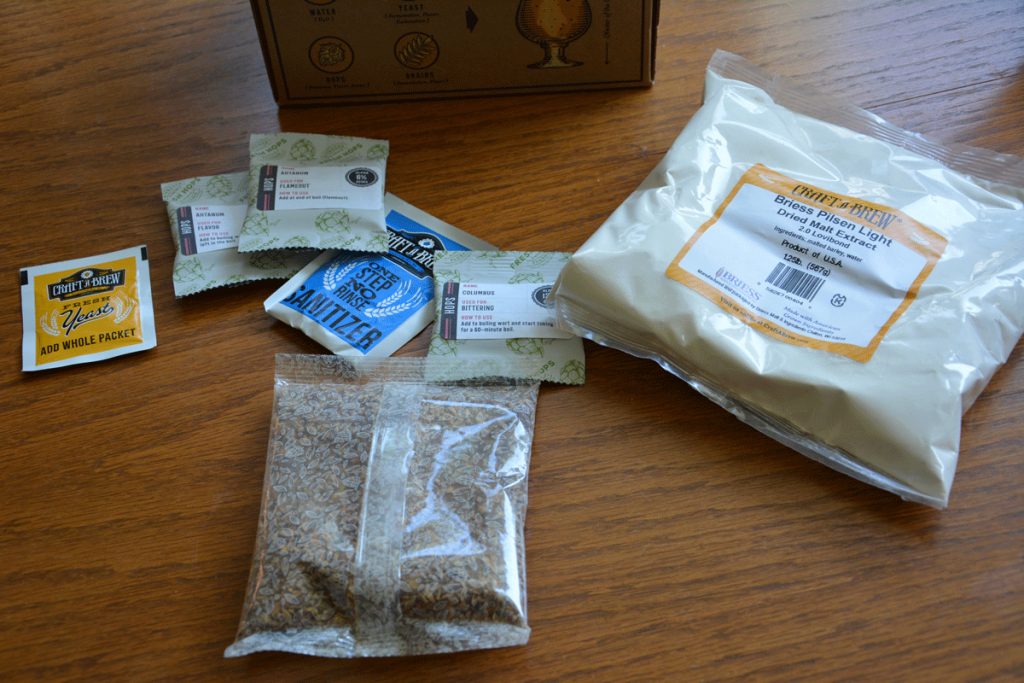
The kit will produce a gallon of beer (128oz), which is roughly (10) 12oz beers, or about a buck and a half per beer for the Stone Pale Ale, which seemed like a nice Summer brew at a bargain price…
At this price point it’s easy to do a few trial runs and get the mistakes out of the way before scaling up to larger batches. If you can follow a simple recipe and have the patience to wait a month-and-a-half for it to go through all the production stages, you should be good to brew.
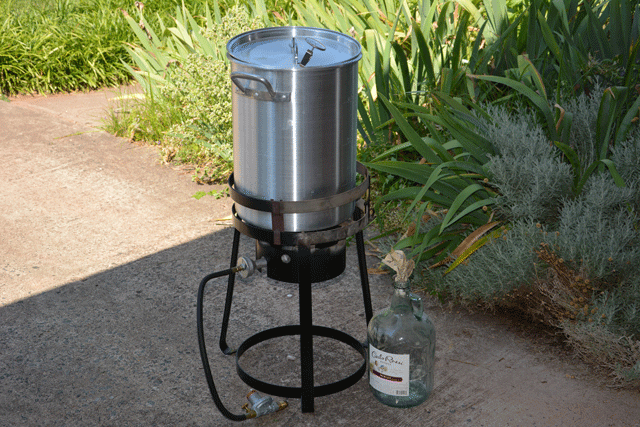
For the Carboy I decided to use an old empty Carlo Rossi (shown in pic below the cooker). It could cost you an additional 10 bucks, but that cost can pay for itself if you invite some friends over for a wine and cheese party!
As for the cooker, this impressive stainless steel Turkey Fryer should do the trick!
With the equipment and ingredients checked off the list, it was time to start making some beer. If you opted for the Carlo Rossi carboy, it will need a #6 stopper. Some kits will usually come with a basic recipe guide. I had to download mine from the internet. The process began with a 20 minute boil of specialty grains followed by a 60 minute boil of the malt extract. It was at this point that I noticed something seemed to have gone very very wrong.
The gallon of beer had gone through a culinary reduction, into what looked to be about 1.5 pints of remaining liquid! The turkey fryer had overpowered the process, boiling off most of the liquid. The recipe guide never mentioned excessive heat might be a problem … a bit of investigation revealed that a single hot plate or stove top are commonly used for the boil. I reached out to Kaley at Craft a Brew to see if I should abandon all hope, but was dazzled by her understanding of the craft of beer, and her kind reassurances to press on, she really knows her stuff.
Note to self – Next time use a danged hot plate!
Save the turkey fryer for a 5 Gallon beer run
My next thoughts were whether I could rescue the recipe by re-hydrating the reduction, infusing the liquid with sugar, then starting the ferment?
The obvious answer is yes to all, but had I ruined the recipe with too much reduction? There’s no way of telling whether the reduction could rejuvenate into a good or a skunky beer without trying. What the heck, the decision boils down to time and effort. The yeast can still accomplish it’s mission of converting sugars into alcohol, as to the flavor only time will tell, I decided move forward with the next phase – fermentation.
A hydrometer is an important piece of equipment in every brewers kit. It will tell you the probability that a certain density if sugary liquid will produce a certain percentage of alcohol after the ferment. It’s a probability because there’s many other uncertainties which can effect the results.You can only master uncertainty over time, by repeated trials, errors and lessons learned.
Having made a lot of home Wine kits, I have a Hydrometer and some experience using it, so I measured the Specific Gravity (SG). A small chart comes with the hydrometer or you can find one easily on the internet. The density of my brew reduction measured a bit over 1.075 (for the approx 1.5 pint). The recipe calls for a gallon of solution. Topping with water back to a Gallon reduced the SG to about 1.015. So I needed to add a proportional amount of sugar to bring the SG back up to 1.045. That should statistically provide the yeast with a nice sweet environment and the potential for 5.8% alcohol in about 2 weeks.
During fermentation the yeast population grows, devouring the sugary solution and producing alcohol as a byproduct. At a comfy room temperature the fermentation will continue until the yeast colony has consumed all the sugars in the solution. When their mission is complete the yeasts die off, coming to rest at the bottom of the carboy. At this point the solution will be ready to be lifted up off the sediment and transferred to a holding tank from which we’ll begin the bottling process.
After setting in a dark, cool, place for a couple of weeks, fermentation ran it’s course. The beer has a nice dark amber color and the sediments have settled to the bottom. Keeping all the equipment clean the beer will be siphoned off the lees in the carboy and transferred into the holding container. The sugar solution in the measuring cup will give the remaining yeast a small kick start to create some carbonation in the bottles.
From the holding container I filled and corked the bottles shown drying in the bottle tree. The wine bottles are 750ml, the Gallon of beer minus the sediment produces about 4.25 bottles of wine. In a couple more weeks the beer will be ready for a taste test.
I waited out the two weeks and the news is good!
It was a fun and rewarding experiment. Next on deck, should I try another gallon or scale up to a 5 gallon run? That decision will have to wait, hope you enjoyed the story.
Mitch Dresdner
Mitch enjoys tinkering with tech across a wide range of disciplines. He loves learning new things and sharing his interests. His work interests run the gamut of: application integration, scalable secure clusters, embedded systems, and user interfaces. After hours you might find him dabbling in the hobby space with Raspberry Pi's, drones, photography, home wine making and other ferments.