A home Security Application with lots of features and great potential.
Motion Eye OS and an excellent application for managing your webcams from within your browser. Created by Calin Cristen, it seems to be a labor of love. The project has been on going for over 4 years, it has recent commits totaling nearly 50K, there have been close to 650 contributors at the time of this writing. It’s an open source project, but if you like it consider making a donation.
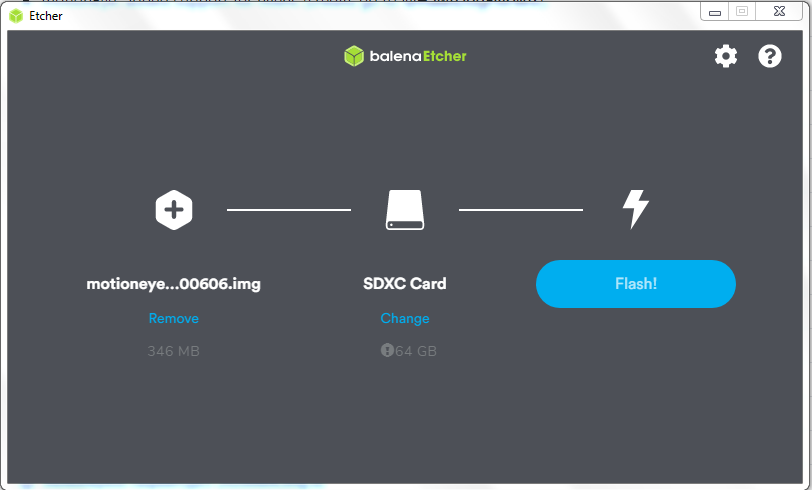
Motion Eye OS runs on a multitude of target platforms. I’ve got a some Raspberry Pi’s that i’m always looking for fun projects for, so we’ll do just that. In this article i’ll expect you have at least some experience with the Raspberry Pi or installing an OS. If you’re just getting started with the Pi there’s lots of great intro’s on the web that can help get you started. For Pi OS installs, I prefer using the Balena Etcher. It can uncompress images before writing and write multiple simultaneous images and it works great from my windows laptops.
Download the image for your target platform and flash to a micro SD card.
If you plan on connecting with Wifi instead of an Ethernet cable be sure to unplug and plug your SSD into your laptop. Use a programmers editor like Nodepad++ to create the wpa_supplicant.conf file in the root directory. The reason for not using Windows Notepad is that it may add some extraneous characters to the file which may fail to be read during boot.
Replace the SSID and PSK with your WiFi id and password. You can also create an empty file called ssh with no file extension in the root directory. The empty ssh file will configure the ssh daemon when you perform a headless boot. The default root user is admin, and there’s no password. With these files created, eject the Micro SD and boot your Raspberry Pi. I found that without the WiFi settings or an Ethernet cable plugged in the boot will panic. Otherwise, note the IP address in the boot and connect from your browser.
wpa_supplicant.conf example
update_config=1
ctrl_interface=/var/run/wpa_supplicant

network={
    ssid="mynet"
    psk="mynet1234"
}
Your initial boot will take some time as Motion Eye OS is configuring storage and system configuration settings. If you’re booting headless you can use the nmap command to find your IP address.
# run nmap to find your IP address i.e.
$ nmap -sn 192.168.1.0/24
In my experiments, I started with an older Pi1 Model B+ which worked fine, but i’ve since moved on to the Pi3 Model B+. The performance of the Quad core processor and 1G RAM is superior to the Pi1. At some point i’ll try a Pi4 Model B with 4G RAM to see if there’s any noticeable improvements.
I also tried the PiZero W, it’s performance is on par with the Pi1. It took a few installs to get it right. The correct image for the Zero is the same as the Pi1, there’s no version number at the end of the image name.
The nitty gritty details about Motion Eye OS can be found on the Wiki here.
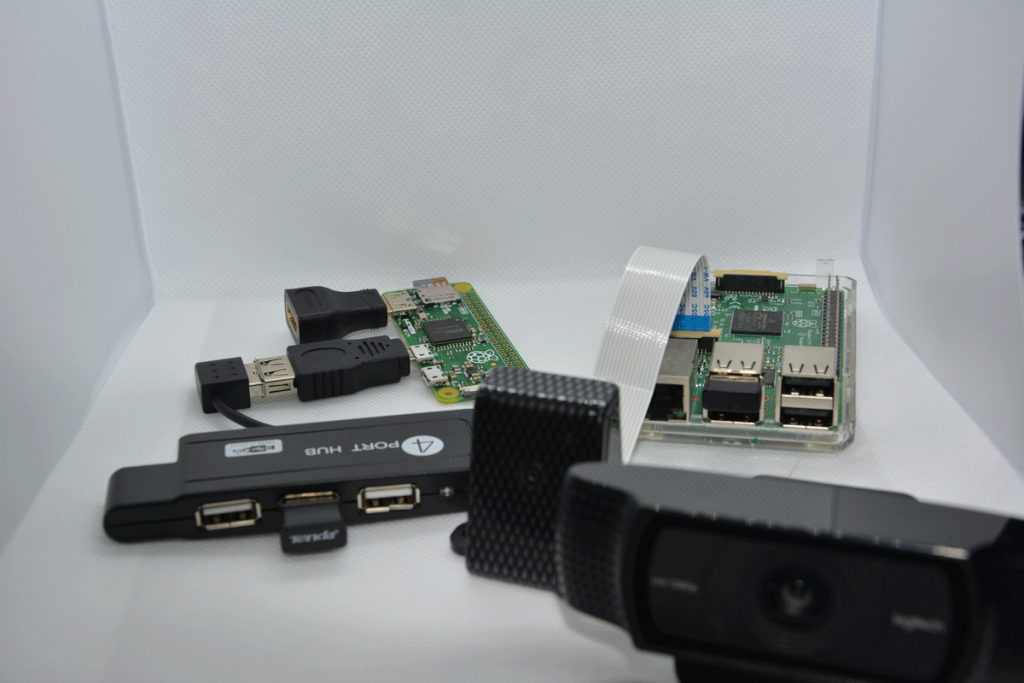
Motion Eye OS has two default accounts, a root Administrative account called admin and a Surveillance account called user. The first thing you should do from the browser interface is to add passwords to these accounts. After you create default passwords for your accounts you can change your TimeZone and add some cameras. In this example i’m using a Raspberry Pi camera and a Logitech HD USB Webcam.
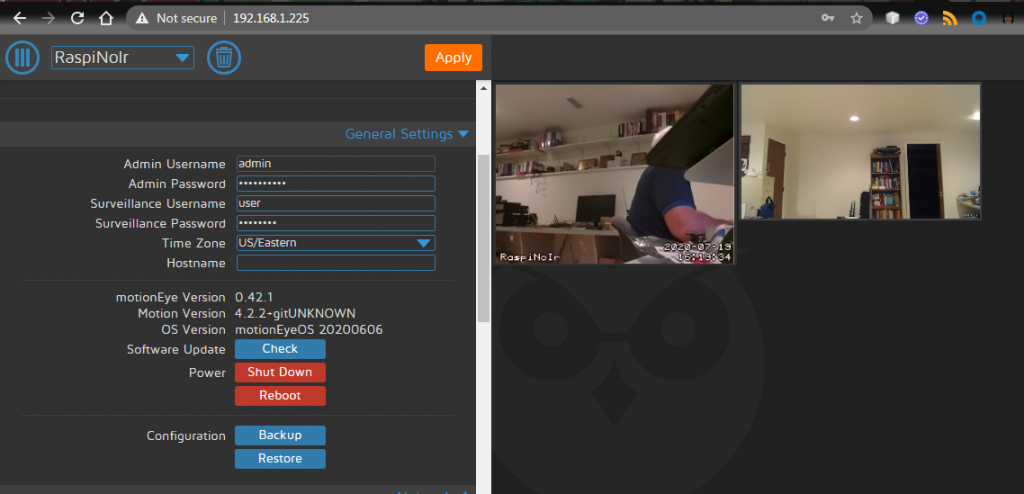
After entering your changes be sure to apply them by clicking the yellow apply button. The user interface it fairly intuitive, you’ll need to play with it a bit to get comfortable. Also in the general Settings you can Shutdown or Reboot your application, Check for application updates and perform Backups.
Under the configuration section for Network you should see the wpa_supplicant settings if you configured your WiFi at boot. Otherwise you can configure your Wifi settings. The services section allows you to choose between FTP, SFTP and Samba (SMB) to alloy you to access Images and Movie files from your Motion Eye OS server. You can also configure to upload your media content to the cloud, synchronizing to your Google Drive.
In the File Storage section, you can change the default location where your media files are stored or choose whether you would like them stored on a network drive. You can also choose whether you would like to invoke an external web hook or execute a Linux command. The Linux command may be a script for calling an API with curl. These capabilities are a bit more advanced, but provide you the capability of getting realtime alerts and providing access to your media from a remote location.
You can control the size of the fonts used for text overlays in the Text Overlay section. Choose where you would like the Camera Name and Timestamp located or create a custom text message. If the font size is too small you can increase it using the slider.
The other sections provide settings which allow you to stream your media, create motion events and schedule when you want your system to be active. Streaming might be a useful Use Case when you have distributed webcams that you might like to interface and control with a lower power PiZero, while streaming motion events to a larger content aggregator.
Streaming is turned off by default, when you enable streaming the default port is 8081. When streaming is enabled you can click the Useful URLs Streaming URL link for the address you can use in Chrome or VLC. In VLC select Media –> Open Network Stream, choose the Network tab and enter your URL. Select the Play button to view the stream.
From this intro I think you’ll agree that Motion Eye OS has a large and rich set of features and capabilities. The best way to learn is to start playing with it. With the number of platforms supported you can get started for under $40 and have a very capable system.
Mitch Dresdner
Mitch enjoys tinkering with tech across a wide range of disciplines. He loves learning new things and sharing his interests. His work interests run the gamut of: application integration, scalable secure clusters, embedded systems, and user interfaces. After hours you might find him dabbling in the hobby space with Raspberry Pi's, drones, photography, home wine making and other ferments.