Ideas for your environment

Sharing ideas on property and environment vars in Mule

In this post we share an approach for accessing your property values and environment variables when performing dataweave transformations in Mule. In the example below, we create two transforms. In the first transform we’ll extract some properties and environment variables and save them in a HashMap for later use in the second transform.

In the second transform we’ll access some HashMap values and for fun, render them as a urlencoded string.

In the dataweave transform below, we’re redirecting the output to a variable called AUTH_MAP as a Java HashMap. The fields are just some typical contrived authentication parameters derived from a properties file.

The syntax for the assignments of grant_type and username makes use of Ant style property placeholders, you may notice some errors in the dataweave editor, but this actually works. Save, click out of the editor and then back in to see if errors resolve. Although this seems to work, there’s a better approach for working with properties in dataweave. The format for deriving properties in dataweave as shown using the example for grantProp.

%dw 2.0
import dw::System
output application/java
---
{
	grant_type: '${myprop.ws.grant_type}',
	username: '${myprop.ws.username}',
	grantProp: p('myprop.ws.grant_type'),
	grantEnv: dw::System::envVar('SHELL'),
	allVars: dw::System::envVars()
}

In the last two examples we show how you would access a single environment variable using the grantEnv example and a dictionary containing all environment variables in the allVars example.

%dw 2.0
output application/x-www-form-urlencoded 
---
{
    grant_type: vars.AUTH_MAP.grant_type, 
    username: vars.AUTH_MAP.username
}

In our second transform we generate a urlencoded string that typically would be sent using an HTTPRequestor as part of an authentication.

Example of URL encoding:

grant_type=1234&username=coyote%40acme.com

I hope you enjoyed this brief but hopefully succinct article on accessing properties and environment variables in dataweave. If you’re curious about how the property file gets read in see the brief note which follows.

src/main/resources/dev-properties.yaml

myprop:
  ws: 
    grant_type: "1234"
    username: "coyote@acme.com"

Reference your dev-properties.yaml file in your properties configuration using Ant style property placeholder like so:

In Anypoint Studio you would define your property as a runtime parameter like so:

-D env=dev

This approach allows for different property setting files for your different environments.

RAID-1 mirroring on Pi

Create a RAID mirror on your Raspberry Pi

In a recent article we discussed how you might Recover a Modicum of your Privacy using NextCloud to bring your secrets back in house, under your auspices. Should you decide to do so, you’re going to want to mirror your data to ensure it’s safe. This post will guide you through the process and share some links if you’de like a deeper understanding of the underlying technologies.

Prerequisites

  1. Two identical SSD drives
  2. Initialzed drives with GPartd

Inexpensive storage and USB3 controller

USB3 Dual bay docking station

Inland 120 GB Solid State Drive

Run the blkid command to verify drives are accessible. They should show up as /dev/sda1 and /dev/sdb1

$ sudo blkid

/dev/mmcblk0p1: LABEL_FATBOOT="boot" LABEL="boot" UUID="4BBD-D3E7" TYPE="vfat" PARTUUID="738a4d67-01"
/dev/mmcblk0p2: LABEL="rootfs" UUID="45e99191-771b-4e12-a526-0779148892cb" TYPE="ext4" PARTUUID="738a4d67-02"
/dev/sda1: UUID="095b9486-fc9d-49df-9ff5-6ee5283c3305" TYPE="ext4" PARTUUID="3a26c570-c21b-4d01-8f4e-9de916a98793"
/dev/sdb1: UUID="968faf3b-80aa-4fa9-95ac-fedcad5f4148" TYPE="ext4" PARTUUID="d3339526-4fe1-4d0c-8062-843b36c26d9f"

Create a redundant RAID-1 mirrored array using the mdadm command below. You may have to first install the command if you haven’t already.

# You may need to install mdadm
$ sudo apt install mdadm -y

# Define the RAID-1 configuration
$ sudo mdadm --create --verbose /dev/md/vol1 --level=1 --raid-devices=2 /dev/sda1 /dev/sdb1

# verify the raid array was created correctly
$ sudo mdadm --detail /dev/md/vol1
     
/dev/md/vol1:
           Version : 1.2
     Creation Time : Sat Dec 26 15:37:11 2020
        Raid Level : raid1
        Array Size : 117152768 (111.73 GiB 119.96 GB)
     Used Dev Size : 117152768 (111.73 GiB 119.96 GB)
      Raid Devices : 2
     Total Devices : 2
       Persistence : Superblock is persistent
       
     Intent Bitmap : Internal
    
       Update Time : Sat Dec 26 15:38:12 2020
             State : clean, resyncing
    Active Devices : 2
   Working Devices : 2
    Failed Devices : 0
     Spare Devices : 0
     
Consistency Policy : bitmap
              
     Resync Status : 5% complete
            
              Name : nextcloudpi:vol1  (local to host nextcloudpi)
              UUID : 796ac3b0:a426c35a:2a2601d2:5564dc2e
            Events : 12 
       
    Number   Major   Minor   RaidDevice State
       0       8        1        0      active sync   /dev/sda1
       1       8       17        1      active sync   /dev/sdb1

Next you will preservce the RAID-1 configuration so that it can be found when you boot. Running the sudo won’t work, so you’ll have to first become the root user.

# the next command will need to be run as root
$ sudo -i

# preserve the RAID-1 config
$ sudo mdadm --detail --scan >> /etc/mdadm/mdadm.conf

# return to normal user using ^D or exit
$ exit

Create the file system

Now it’s time to create the file system, we’ll name it /dev/md/vol1, if you decide to change the name be sure to replace it in the commands that follow.

$ sudo mkfs.ext4 -v -m .1 -b 4096 -E stride=32,stripe-width=64 /dev/md/vol1

mke2fs 1.44.5 (15-Dec-2018)
fs_types for mke2fs.conf resolution: 'ext4'
Filesystem label=
OS type: Linux
Block size=4096 (log=2)
Fragment size=4096 (log=2)
Stride=32 blocks, Stripe width=64 blocks
7323648 inodes, 29288192 blocks
29288 blocks (0.10%) reserved for the super user
First data block=0
Maximum filesystem blocks=2176843776
894 block groups
32768 blocks per group, 32768 fragments per group
8192 inodes per group
Filesystem UUID: 04d7502e-dc5d-4c6e-ba1b-a2128f1baabf
Superblock backups stored on blocks:
        32768, 98304, 163840, 229376, 294912, 819200, 884736, 1605632, 2654208,
        4096000, 7962624, 11239424, 20480000, 23887872

Allocating group tables: done
Writing inode tables: done
Creating journal (131072 blocks): done
Writing superblocks and filesystem accounting information: done

At this point you should be able to mount your new file system.

# mount filesystem to access with blkid
$ sudo mount /dev/md/vol1 /mnt

$ ls /mnt

To use your new RAID-1 array you’ll need to add a mount point in /etc/fstab assigning the UUID. Let’s get the ID using blkid. Mine shows up as /dev/md127, yours may be the same of show up as /dev/md/vol1 or another if you renamed it.

$ sudo blkid

/dev/mmcblk0p1: LABEL_FATBOOT="boot" LABEL="boot" UUID="4BBD-D3E7" TYPE="vfat" PARTUUID="738a4d67-01"
/dev/mmcblk0p2: LABEL="rootfs" UUID="45e99191-771b-4e12-a526-0779148892cb" TYPE="ext4" PARTUUID="738a4d67-02"
/dev/sda1: UUID="796ac3b0-a426-c35a-2a26-01d25564dc2e" UUID_SUB="5b1e44b2-08e2-6fd3-ef02-09ec39c94a4a" LABEL="nextcloudpi:vol1" TYPE="linux_raid_member" PARTUUID="3a26c570-c21b-4d01-8f4e-9de916a98793"
/dev/sdb1: UUID="796ac3b0-a426-c35a-2a26-01d25564dc2e" UUID_SUB="19aef3eb-a8b9-8a46-e94e-0abfce9f50cb" LABEL="nextcloudpi:vol1" TYPE="linux_raid_member" PARTUUID="d3339526-4fe1-4d0c-8062-843b36c26d9f"
/dev/mmcblk0: PTUUID="738a4d67" PTTYPE="dos"
/dev/md127: UUID="04d7502e-dc5d-4c6e-ba1b-a2128f1baabf" TYPE="ext4"

Making your changes permanent

With the UUID you can add the new mount point into /etc/fstab. We’ll backup the file first as a good practice.

# backup original fstab
$ sudo cp /etc/fstab /etc/fstab.bak
$ sudo vi /etc/fstab

# just before the bottom comments, make a space and enter the following 
# on a single line (replace your_uuid with the UUID of your file system):

# i.e. UUID=your_uuid /mnt ext4 defaults 0 0
# My fstab entry would look like this, use your UUID from blkid:
UUID=394fd8f2-7b2a-474f-8e58-48b81a6ca8fb /mnt ext4 defaults 0 0

That’s all there is to it!

References

Standard RAID levels described

Raspberry Pi RAID NAS Server

Nitty gritty command details

Format and partition new drive

Consuming Kafka messages in Mule

Getting past the simplistic hello world getting started consumer

There’s plenty of examples you can search for that demonstrate how to go about consuming simple messages in Mule from a Kafka Consumer.

Most of the simple examples you’ll find will look like this one, which is right out of the Mule documentation.

However, in the real world, Kafka message producers prefer sending an array of messages in batches – the producer will attempt to batch records together into fewer requests whenever multiple records are being sent to the same partition. This helps performance on both the client and the server. This pattern establishes the default batch size in bytes. If you attempt to work with an array of messages in the same way as a simple message, you’ll certainly get an error.

Typical example of a simple Kafka consumer flow

<!-- Typical simple example for consuming Kafka messages -->
<flow name="Consumer-Flow" >
  <kafka:message-listener doc:name="Consume message endpoint" 
    config-ref="Apache_Kafka_Consumer_configuration"/>
  <logger level="INFO" doc:name="Logger" message="'New message arrived: ' ++ payload ++ &amp;quot;, key:&amp;quot; ++ attributes.key ++ &amp;quot;, partition:&amp;quot; ++ attributes.partition ++ &amp;quot;, offset:&amp;quot; ++ attributes.offset"/>
</flow>

With an array of messages, before you can get to the payload elements you’re going to need to unpack the Kafka message object that wraps the byte[ ] stream. Complex messages you receive from the Kafka Consumer will come wrapped in a com.mulesoft.connectors.kafka.api.source.Record object which you’ll need to convert into a java.io.ByteArrayInputStream object before you can work with the payload, as you do with messages you receive from other Mule connectors.

Here’s a sample test flow which I created to demonstrate the steps you’ll need to perform. In the Each Kafka Record loop, you’re going to need to iterate through collection payload.payload to get to each java.io.ByteArrayInputStream object. In the Set Payload task, I assign the media type as application/json to provide a hint of the data type we’re processing to help the DW with transforms. The payload element is set to itself, passing through unchanged.

Those twos steps are where the magic happens. Once we have a streaming byte array for our payload, it’s business as usual. In the first transform we convert the byte array into a JSON object. The second transform is just for fun, to create a HashMap variable from the JSON.

The first DW Transform creates our JSON object

%dw 2.0
output application/json
//input payload application/json

---
payload

In the next DW Transform I pass the JSON object through the transform as shown in the code snippet above and create a Variable to contain a HashMap of the JSON. This is a trivial step once our message is a JSON object.

Prior to Mule version 4 if you wanted to convert a byte stream into an object map you might have to wrangle the payload with some Groovy code. This is no longer needed in version 4, byte arrays can be simply transformed by DataWeave into Java HashMaps. Muleoft advises against twiddling with byte array streams.

A solution for doing this is shown for below, in case you still have earlier versions of Mule that may need to handle byte array conversion to JSON.

# Groovy snippet converts JSON byte stream into a HashMap
import groovy.json.*
import java.nio.charset.StandardCharsets

int len = payload.available()
byte[] bytes = new byte[len]
payload.read(bytes, 0, len)
String jsonStr = new String(bytes, StandardCharsets.UTF_8)

def slurper = new JsonSlurper()
payload = slurper.parseText(jsonStr)

If you get errors from AnyPoint Studio that Nashorn is the only scripting engin available, you may need to follow guidance in the Mulesoft Post-Upgrade steps to configure sharedLibraries and dependency tags in pom.xml.

Groovy engine dependency configuration

<!-- Ensure the Groovy Scripting engine is defined for both -->

<sharedLibrary>
  <groupId>org.codehaus.groovy</groupId>
  <artifactId>groovy-all</artifactId>
</sharedLibrary>

  ...

<dependency>
  <groupId>org.codehaus.groovy</groupId>
  <artifactId>groovy-all</artifactId>
  <version>2.4.16</version>
  <classifier>indy</classifier>
</dependency>

It took me some time to understand how to process complex messages from the Kafka Consumer as there were no good examples I could find at the time of this post, so I thought I would create this one to share with the community.

I hope this article helps you understand better how to go about processing complex messages from Kafka consumer.

DataWeave Playground

Run the new Integrated Development Environment for DataWeave without a Docker dependency

The DataWeave Playground is an integrated development environment that enables you to experiment with complex Mappings and Transformations outside of AnypointStudio. When we first looked at the Playground, a creation of Mariano De Achaval and the Mulesoft Dataweave team, it was an experimental version running inside of a Docker container. While still a work in progress, through the magic of GraalVM, the Playground runs sans Docker, as a binary, on Mac, Linux and Windows.

In my earlier article Transformative Moments we started in the middle of the story, demonstrating how to get immediate business value from the DataWeave Command Line interface (DW CLI). We went on to learn how to create Command Line Services which created information pipelines between data sources and the sink. Now we’ll rewind to the beginning of the story to look at the most important piece of all, the DataWeave Playground. You’ll learn how to run the IDE as a standalone application, outside of the Docker container.

To begin we’ll create the DW CLI folder and the environment settings which are needed. To make these changes permanent you can add them to your path in the Windows environment dialog settings or to the .bashrc file in your Linux HOME directory. 

CLI Configuration Settings

rem Configure DW CLI home in Windows
md %USERPROFILE%\.dw
set DW_HOME=%USERPROFILE%\.dw
set DW_LIB_PATH=%DW_HOME%\libs
set PATH=%DW_HOME%\bin;%PATH%

---

# Configure DW CLI home in Linux
mkdir $HOME/.dw
export DW_HOME=$HOME/.dw
export DW_LIB_PATH=$DW_HOME/libs
export PATH=$DW_HOME/bin:$PATH

Download the DW CLI runtime

In the environment settings above we configured the location for the DW CLI runtime onto your path. Download the runtime from the DW CLI Github repository. The Zip files are located in the Manually paragraph.

After you unzip the download, install the bin and libs folders into the .dw folder you created in the Initial Configurations section above.

Running the DW Playground

After you’ve completed the download and completed the installation, we can take a look at the most prominent part of the DW CLI, the Playground. You can refer to the articles above for more information on the wizardry you can unleash with the DW CLI and you can use the earlier examples in the Playground.

$ dw --eval --spell Playground

Fetching `null's` Grimoire.
Cloning into 'C:\Users\DresdnerMitchell\.dw\grimoires\data-weave-grimoire'...
remote: Enumerating objects: 62, done.
remote: Counting objects: 100% (62/62), done.
remote: Compressing objects: 100% (51/51), done.
remote: Total 62 (delta 16), reused 35 (delta 1), pack-reused 0
Unpacking objects: 100% (62/62), 9.79 KiB | 92.00 KiB/s, done.
Http Server started at localhost:8082

The first time you invoke the Playground it fetches the code from the Git repository, installs it into your .dw folder and casts a spell to run the Playground. When the Playground starts you can access it using your browser, it listens on Port 8082.

The IDE is familiar and intuitive, you may recall the look and feel from the Docker implementation. The Input sources of information are located on the left, scripting is in the middle and the output displays on the right.

Clicking on the default input type allows you to change to another type such as XML or CSV. 

You can open the DW API reference from the button bar at the bottom and the Log Viewer as well. This is a nice feature, providing most of what you need in the IDE.

In the top right you can change the language level to conform with the runtime version you’ll be working with. This assures that when you bring you code in to Anypoint Studio it will work the same.

You can find plenty of examples to try out in the Playground IDE from the DataWeave Cookbook. and in the earlier article where we discussed the experimental Docker version.  These articles should give you plenty to get going and help to improve your skills with DataWeave.

If you benefit from and enjoy using the Playground, be sure to give the project a Github Star!

Command line services

We investigate whether it’s possible to build micro services from the command line

In my last post Transformative Moments we investigated the Dataweave CLI which we used to map and transform data from files. We discussed the notion of information pipelines and retrieving data from internet servers, but we didn’t show any examples of how you might do that. With some creative scripting, you should be able apply what you learn to constructing viable script based micro services.

For our services we’ll be using the API resources from {JSON} Placeholder. If you have an interest in creating your own Mock services without having to code, check out my article Zero Code REST with JSON Server.

For our first example we’ll map and transform ToDo data, which will filter to select a subset of ToDo’s. If you haven’t installed DW CLI already, be sure to read how in Transformative Moments. I’m going to use the Bash shell from Windows 10 and make some adjustments to the environment setting used in the earlier post. If you’re using Linux you can use the earlier environment settings.

Initial configuration

# Configure Bash env setting for Windows 10 file locations
# add DW CLI to PATH
export PATH=/c/Tools/dw/bin

# Adjust this location to where you want your scripts to go
export DW_HOME=/c/Home/dev/Mule/dw

# download my github scripts if you haven't already
dw --add-wizard MitchDresdner

# if you need to refresh the grimoires to download new or updated code
dw --update-grimoires

# static script locations
export JSON_DATA=$DW_HOME/grimoires/MitchDresdner-data-weave-grimoire/JSON

We’ll review both the Dataweave in-line method and incanting a grimoire for completeness.

Map and Filter ToDo – inline

# Fetch data from ToDo API
$ curl -s http://jsonplaceholder.typicode.com/todos | dw 'output application/json --- payload filter ($.id > 40 and $.id < 43)'

[
  {
    "userId": 3,
    "id": 41,
    "title": "aliquid amet impedit consequatur aspernatur placeat eaque fugiat suscipit",
    "completed": false
  },
  {
    "userId": 3,
    "id": 42,
    "title": "rerum perferendis error quia ut eveniet",
    "completed": false
  }
]

# same idea but create some new mappings
$ curl -s http://jsonplaceholder.typicode.com/todos | dw 'output application/json --- payload filter ($.id > 40 and $.id < 43) map (todo) -> { id: todo.id, task: todo.title, done: todo.completed }'
[
  {
    "id": 41,
    "task": "aliquid amet impedit consequatur aspernatur placeat eaque fugiat suscipit",
    "done": false
  },
  {
    "id": 42,
    "task": "rerum perferendis error quia ut eveniet",
    "done": false
  }
]

Map and Filter ToDo – grimoire

# Uses a spell and static data
dw -i payload $JSON_DATA/ToDo-4.json --spell MitchDresdner/FilterToDo
[
  {
    "myId": 199,
    "task": "numquam repellendus a magnam",
    "done": true
  },
  {
    "myId": 200,
    "task": "ipsam aperiam voluptates qui",
    "done": false
  }
]

# same idea but pulls data from an API
$ curl -s http://jsonplaceholder.typicode.com/todos | dw --spell MitchDresdner/FilterToDo
[
  {
    "myId": 199,
    "task": "numquam repellendus a magnam",
    "done": true
  },
  {
    "myId": 200,
    "task": "ipsam aperiam voluptates qui",
    "done": false
  }
]

Both are pretty good approaches, the inline approach is nice, but may quickly get out of hand as your script becomes more complex. I prefer the spell format for readability. You can use the Dataweave Playground to get it working and add the final script to your grimoire folder.

Shout out to Mariano De Achaval – For creating DW Playground as a GraalVM container, written in Dataweave. This is totally awesome, the Playground can now run from an executable, without a Docker dependency.

# Run the Playground
#   http://localhost:8082
$ dw --eval --spell Playground

We can extend our data pipeline now to do the following:

  • Fetch a ToDo using a GET request
  • Map the results to satisfy the posts API
  • POST the results using CURL
$ curl -s http://jsonplaceholder.typicode.com/todos | dw 'output application/json --- payload filter ($.id == 42) map (todo) -> { userId: todo.userId, title: todo.title, body: "Task completed = " ++ todo.completed }' | dw 'output application/json --- payload[0]' |  curl -H "Content-Type: application/json" -s -X POST http://jsonplaceholder.typicode.com/posts
{
  "id": 101
}

The additional invocation of DW CLI in the pipeline extract the object from the array. The JSON Placeholder won’t preserve our POST so don’t bother looking for it. In conclusion, it appears that we can implement a scripted approach to integrated API systems.

Just because we can doesn’t mean that we should. Error handling, fault tolerance, security and scalability are the hallmarks of a real framework. The DW CLI brings powerful new capabilities to command line scripting not found in other Linux tools.

As I discover other practical uses i’ll add them here.

Flash your Linux BIOS using FreeDoS

Patching your UEFI and BIOS firmware on a Linux system can be challenging. One simple way you can accomplish this is by using FreeDoS.

Prerequisites

I’ll expect you’ll know the basic differences between BIOS and UEFI. UEFI is the successor to BIOS responsible for booting your computer and providing the hardware interface to devices. UEFI has a richer feature set than BIOS and improved security. In the sections below when I say BIOS, consider it synonymous to UEFI.

Before we begin let’s get a few warning out of the way. Some of the techniques described below may have serious unintended consequences.

Flashing a BIOS should never be undertaken lightly, a little mistake can brick your machine, which may not be recoverable. If you’re not sure what you’re doing and don’t have the time to learn, this may be a good point to stop reading.

The procedure which follows is intended to provide you with a tool for flashing a BIOS. This tools is just one part of the job. Your BIOS vendor also provides a tool which will inject new software into the system which is responsible for starting your computer and controlling devices. It’s up to you to understand how the vendors tool works.

With the caveats out of the way, lets see how you might go about doing it. My own desktop is about 10 years old now, it has an MSI motherboard, a dual core AMD processor and 4G of RAM. Ok, so it’s not quite as fast as my Raspberry Pi 4, but running Linux Mint Cinnamon version 20 it can still be a useful machine.

Running Mint and previous Ubuntu versions I noticed a quirk where the desktop would rasterize. The BIOS was reserving 64M of system memory for the embedded Nvidia motherboard video chip. The Linux driver was probably not honoring the memory reserved by the BIOS and likely stomping on the same, causing the raster effect. Disabling the BIOS memory reservation to the video chip made the problem less frequent, but didn’t eliminate it entirely.

As a possible solution I contemplated loading the most recent MSI BIOS release. With every new solution comes new takeoff’s. When running a Linux system, there’s not easy way to flash the BIOS. Vendors typically provide a Windows .EXE file to flash the BIOS. I tried some of the Windows emulation programs in Linux, but each failed for different reasons.

What I needed was a way to boot my machine into DOS, flash the BIOS and return to the normal hard drive Linux boot with the upgrade applied. It seemed like a perfect solution for booting from a USB thumb drive running a DOS ISO image. For my DOS ISO I decided on FreeDoS 1.2. Earlier adopters that came before me recommended a USB ISO installer called Rufus, so I downloaded both and proceeded.

Running Rufus was easy and intuitive.

You’ll select the ISO for the FreeDoS image you downloaded and unzipped and that’s about all there is to it.

The toughest decision was the wasted 31.5GB of thumb drive space. The FreeDoS image itself only takes about .5GB, so the rest is wasted. You could probably partition the drive and use the rest for some sort of backup storage, but the 32GB USB3 drive was only $6.99 on Amazon. It’s about the price of an average sandwich. The same principle applies: eat once, digest, gone.

Once you’ve imaged the drive there’s a few files you’ll need to tweak. The FreeDoS image is designed to install on another target. Instead, you’ll override the defaul behavior to make the USB drive the bootable target. To accomplish this, you’ll need to move the setup directory from D:\FDSETUP\BIN to D:\BIN.

Next, edit D:\FDCONFIG.SYS and D:\AUTOEXEC.BAT to remove references to the FDSETUP folder. The Autoexec file is hidden, but if you type the name in your editor while opening the file it will read it in. I’ve provided the tweaks for your review or use below.

FDCONFIG.SYS

!COUNTRY=001,858:\FDSetup\BIN\COUNTRY.SYS
!LASTDRIVE=Z
!BUFFERS=20
!FILES=40

DOS=HIGH
DOS=UMB
DOSDATA=UMB

DEVICE=\BIN\HIMEMX.EXE
SHELLHIGH=COMMAND.COM \BIN /E:2048 /P=\AUTOEXEC.BAT

AUTOEXEC.BAT

@echo off
SET OS_NAME=FreeDoS
SET OS_VERSION=1.2
SET DOSDIR=
SET LANG=EN
SET PATH=%dosdir%\BIN;\GNU\bin;QEDIT

SET DIRCMD=/P /OGN /Y

SET TEMP=%dosdir%\TEMP
SET TMP=%TEMP%

rem SET NLSPATH=%dosdir%\NLS
rem SET HELPPATH=%dosdir%\HELP
rem SET BLASTER=A220 I5 D1 H5 P330
rem SET COPYCMD=/-Y

DEVLOAD /H /Q %dosdir%\BIN\UDVD2.SYS /D:FDCD0001

SHSUCDX /QQ /D3

rem SHSUCDHD /QQ /F:FDBOOTCD.ISO

FDAPM APMDOS

rem SHARE

rem NLSFUNC %dosdir%\BIN\COUNTRY.SYS
rem DISPLAY CON=(EGA),858,2)
rem MODE CON CP PREP=((858) %dosdir%\CPI\EGA.CPX)
rem KEYB US,858,%dosdir%\bin\keyboard.sys
rem CHCP 858
rem PCNTPK INT=0x60
rem DHCP
rem MOUSE

rem DEVLOAD /H /Q %dosdir%\BIN\UIDE.SYS /H /D:FDCD0001 /S5

SHSUCDX /QQ /~ /D:?SHSU-CDR,D /D:?SHSU-CDH,D /D:?FDCD0001,D /D:?FDCD0002,D /D:?FDCD0003,D

rem MEM /C /N

SHSUCDX /D

rem DOSLFN

rem LBACACHE.COM buf 20 flop

SET AUTOFILE=%0
SET CFGFILE=\FDCONFIG.SYS
alias reboot=fdapm warmboot
alias reset=fdisk /reboot
alias halt=fdapm poweroff
alias shutdown=fdapm poweroff

rem alias cfg=edit %cfgfile%
rem alias auto=edit %0
rem goto SkipLanguageData

rem ***** Language specific text data.
rem English (EN)
set AUTO_HELP=Type /fWhite Help /fGray to get support on commands and navigation.
set AUTO_WELCOME=Welcome to /fGreen %OS_NAME% /fCyan %OS_VERSION% /fGray ( /s- /fYellow %LANG% /fGray )

:SkipLanguageData
vecho /p Done processing startup files /fCyan FDCONFIG.SYS /a7 and /fCyan AUTOEXEC.BAT /a7/p

rem if exist SETUP.BAT CALL SETUP.BAT BOOT

if not exist %DOSDIR%\BIN\WELCOME.BAT goto V8Welcome
call WELCOME.BAT
goto Done

:V8Welcome
set LANGFILE=FDSETUP\SETUP\%LANG%\FDSETUP.DEF
if not exist %LANGFILE% SET LANGFILE=%0
if not exist %DOSDIR%\BIN\HELP.EXE goto NoHelp
vecho /t %LANGFILE% AUTO_HELP HELP
vecho
:NoHelp
rem %AUTO_WELCOME% %OS_NAME% %OS_VERSION% 
vecho /p %AUTO_WELCOME%  /fGreen " http://www.freedos.org"
vecho
set LANGFILE=

:Done

In the Autoexec I made some additional tweaks:

  • Disabled setup
  • Added the Qedit DOS editor
  • Cleaned up setup path references
  • Display message improvements
  • Attempted to add GNU tools

You can eliminate the GNU reference in the path spec in autoexec.bat, it seems to have been compiled using Window libraries and won’t work. I left the reference a place holder in case I wanted to add some working DOS utilities later. I also attempted to run the SysInternals and Mingw linux tools, but ran into the same issue as GNU, they’re incompatible with DOS.

If you haven’t already done so, be sure to change the BIOS boot order to boot from the USB drive before your hard drive. You’ll need to figure out the magic key to press during boot. For mine it’s the Del key, other possibilities might be F1, F2, F8. You’ll need to check which key is specified by your BIOS manufacturer.

At this point you should be able to boot from your USB and flash the BIOS. I created a BIOS folder at the root (D:\BIOS) containing the latest image and vendors .EXE flashing program.

Before flashing, recall the warning above and be sure to read the documentation provided by the manufacturer. You’ll want to backup the existing code in the BIOS before you make any changes. There’s probably an option on the flash program to do this. If anything doesn’t work quite right on the new version this is how you’ll recover.

If you’ve followed this far you’ve probably successfully flashed your BIOS and consider this topic done. I hope you found the read interesting and rewarding!

After thoughts

When you’ve completed flashing a BIOS you may not need to repeat the process for several years or ever. You can recover your USB drive by creating an ISO image of the USB, which will be a snapshot of all the changes you’ve made.

To create an ISO image I installed gnome-disk-utility on my Raspberry Pi. Afterward, I performed the following:

  • scp the ISO file from Raspberry Pi to windows
  • Wipe the USB drive with SD Formatter
  • Reimage using Balena Etcher
  • Verify the new FreeDoS image
  • Save the ISO file and wipe the USB

Craft beer making, for mere mortals

It’s an easy new hobby to pick up, share with your friends and make some new ones!

Being curious by nature, i’m always on the lookout for new hobbies, especially those with a low barriers to entry. Having dabbled a bit with Home Wine making, Artisan Breads and some other ferments, Craft Brewing seemed to be within my realm of possibilities.

I set a goal for myself, to minimize the startup cost by reusing the wine making equipment I already had and to give brew making a try using an all inclusive ingredients kit. Who knows, maybe I’de get bored too quickly or turn out to be a really bad brew meister. No sense making extravagant investments in new equipment too soon. If all went well, there’ll be time to rethink this, better off procrastinating new equipment decisions till later.

Most brew kits cover all the details you’ll need to know about the equipment that’s needed and they provide a simple recipe for you to follow. It mostly comes down to keeping clean of micro organisms and following the basic recipe. The basic stuff you’ll need is shown in steps B-G below and can be purchased at the local brew store or on-line for around $10. If this is your first brew, I’d say the thermometer is optional and will have more to say about the carboy later.

Basic beer making equipment

Having settled the equipment problem, I searched the internet for a cheap-but-good recipe kit and decided on the one below from Craft a Brew. These folks do an awesome job of putting together everything you need to make great beers by following a simple recipe. For beginners like me or the seasoned veterans this is a huge advantage.

Just the ingredients ma'am
Just the ingredients ma’am

The kit will produce a gallon of beer (128oz), which is roughly (10) 12oz beers, or about a buck and a half per beer for the Stone Pale Ale, which seemed like a nice Summer brew at a bargain price…

At this price point it’s easy to do a few trial runs and get the mistakes out of the way before scaling up to larger batches. If you can follow a simple recipe and have the patience to wait a month-and-a-half for it to go through all the production stages, you should be good to brew.

Beer cooker and carboy

For the Carboy I decided to use an old empty Carlo Rossi (shown in pic below the cooker). It could cost you an additional 10 bucks, but that cost can pay for itself if you invite some friends over for a wine and cheese party!

As for the cooker, this impressive stainless steel Turkey Fryer should do the trick!

With the equipment and ingredients checked off the list, it was time to start making some beer. If you opted for the Carlo Rossi carboy, it will need a #6 stopper. Some kits will usually come with a basic recipe guide. I had to download mine from the internet. The process began with a 20 minute boil of specialty grains followed by a 60 minute boil of the malt extract. It was at this point that I noticed something seemed to have gone very very wrong.

The gallon of beer had gone through a culinary reduction, into what looked to be about 1.5 pints of remaining liquid! The turkey fryer had overpowered the process, boiling off most of the liquid. The recipe guide never mentioned excessive heat might be a problem … a bit of investigation revealed that a single hot plate or stove top are commonly used for the boil. I reached out to Kaley at Craft a Brew to see if I should abandon all hope, but was dazzled by her understanding of the craft of beer, and her kind reassurances to press on, she really knows her stuff.

Note to self – Next time use a danged hot plate!

Save the turkey fryer for a 5 Gallon beer run

My next thoughts were whether I could rescue the recipe by re-hydrating the reduction, infusing the liquid with sugar, then starting the ferment?

The obvious answer is yes to all, but had I ruined the recipe with too much reduction? There’s no way of telling whether the reduction could rejuvenate into a good or a skunky beer without trying. What the heck, the decision boils down to time and effort. The yeast can still accomplish it’s mission of converting sugars into alcohol, as to the flavor only time will tell, I decided move forward with the next phase – fermentation.

A hydrometer is an important piece of equipment in every brewers kit. It will tell you the probability that a certain density if sugary liquid will produce a certain percentage of alcohol after the ferment. It’s a probability because there’s many other uncertainties which can effect the results.You can only master uncertainty over time, by repeated trials, errors and lessons learned.

Having made a lot of home Wine kits, I have a Hydrometer and some experience using it, so I measured the Specific Gravity (SG). A small chart comes with the hydrometer or you can find one easily on the internet. The density of my brew reduction measured a bit over 1.075 (for the approx 1.5 pint). The recipe calls for a gallon of solution. Topping with water back to a Gallon reduced the SG to about 1.015. So I needed to add a proportional amount of sugar to bring the SG back up to 1.045. That should statistically provide the yeast with a nice sweet environment and the potential for 5.8% alcohol in about 2 weeks.

During fermentation the yeast population grows, devouring the sugary solution and producing alcohol as a byproduct. At a comfy room temperature the fermentation will continue until the yeast colony has consumed all the sugars in the solution. When their mission is complete the yeasts die off, coming to rest at the bottom of the carboy. At this point the solution will be ready to be lifted up off the sediment and transferred to a holding tank from which we’ll begin the bottling process.

Mise en place for beer bottling

After setting in a dark, cool, place for a couple of weeks, fermentation ran it’s course. The beer has a nice dark amber color and the sediments have settled to the bottom. Keeping all the equipment clean the beer will be siphoned off the lees in the carboy and transferred into the holding container. The sugar solution in the measuring cup will give the remaining yeast a small kick start to create some carbonation in the bottles.

From the holding container I filled and corked the bottles shown drying in the bottle tree. The wine bottles are 750ml, the Gallon of beer minus the sediment produces about 4.25 bottles of wine. In a couple more weeks the beer will be ready for a taste test.

I waited out the two weeks and the news is good!

It was a fun and rewarding experiment. Next on deck, should I try another gallon or scale up to a 5 gallon run? That decision will have to wait, hope you enjoyed the story.

The Next Generation Enterprise Services Bus

Moving toward the next generation of ESB’s

The Enterprise Services Bus (ESB) has been around for a while now and we may think of the bus as being a commodity resource. ESB’s are not all the same and some may have improved by the addition of incremental features as well as from lessons learned in the field. Smaller, more nimble vendors, can implement changes at a much faster rate.

In hindsight, when we consider our application integrations, we’re reminded to throw away the first and perhaps the second too. They’re mostly explorations, experiments in understanding the technologies and the business requirements. When we have an improved understanding of the business needs, we can make better informed choices about technology and solutions. There may also be other business reasons to justify moving to the next generation of an ESB, such as:

  • Lower Total Cost of Ownership (TCO) due to smaller VM size and lower resource utilization footprint.
  • Reduction or elimination of exorbitant license fees.
  • New capabilities and features to satisfy your modern Use Cases which weren’t previously available.

With the coming of Internet 2.0 and the Internet of Things (IOT), business will many have new requirements for interacting with: devices, gadgets, smart homes and streams of information in whole new ways. These requirements were never contemplated by earlier generations of ESB designers. To get a better understanding of how the next generation of ESB’s can handle to these requirements, try them out in a small lab like environment as a Proof of Concepts (POC). A POC will allow you experiment with concepts and ideas rapidly, and possibly incubate them into what may become future product sprints.

A next generation ESB i’ve recently dabbled with, which seems to satisfy next generation internet messaging requirements is the Neural Autonomic Transport System (NATS). NATS was created by Derek Collison who was responsible for building and expanding TIBCO’s primary messaging platform. TIBCO invented the concept of the ESB and created the phenomena of realtime event driven enterprise messaging. It’s from Derek’s lessons learned about what a next generation ESB platform should be, that led to the inception of NATS. NATS is maintained under the governance model of the Cloud Native Computing Foundation (CNCF) and is licensed by Apache License v2.0.

In the sections which follow we’ll stand up a nats-server instance and interact with it using a client interface. There’s a wide range of CPU’s and platforms including Docker and Kubernetes, which are supported by the NATS Server, and a growing list of plugin connectors. The NATS documentation is among the best that i’ve seen for an Open Source project.

Without further ado, lets get started with some basic installs on some Raspberry Pi’s and a Windows 10 laptop to get a sense for the ease of installing and configuring the ESB. In future posts we can delve a bit deeper to better understand the richer feature sets.
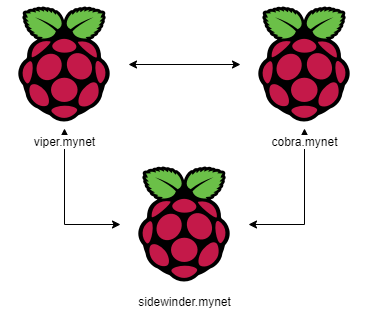
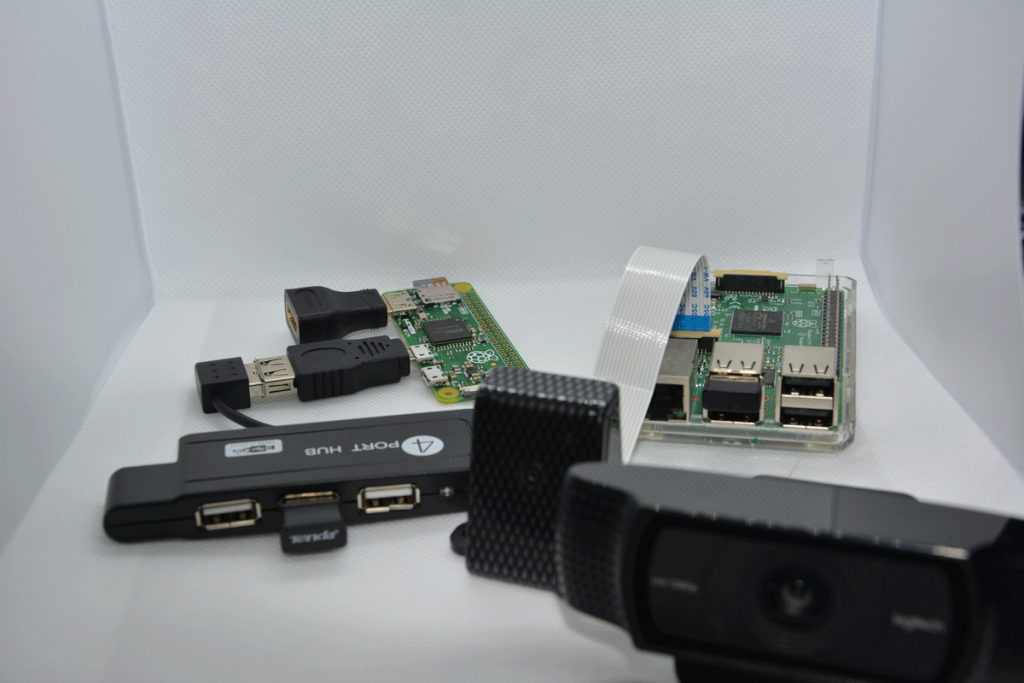
Raspberry Pi 4 lab

In my home mad scientist’s laboratory i’ll be using some combination of the Raspberry’s shown here and for good measure will add in a Windows 10 laptop as well to review a deployment in a Docker container.

The Pi 4 is an ARM 7 CPU and will require the following download. We’ll create a bin directory for the nats-server that we’ll link to from a folder in our HOME directory which we’ll unzip the downloaded server archive into. If you don’t already have a $HOME/bin and $HOME/Install folder lets go ahead and create them.

Install nats-server on Raspberry Pi 4

# Create install and bin folders if needed
viper: $ cd $HOME && mkdir bin Install

# Download and install nats-server
viper: $ wget https://github.com/nats-io/nats-server/releases/download/v2.1.7/nats-server-v2.1.7-linux-arm7.zip

viper: $ cd $HOME/Install
viper: $ unzip $HOME/Downloads/nats-server-v2.1.7-linux-arm7.zip

# link to the server from your bin folder, add bin for your path
viper: $ cd $HOME/bin && ln -s $HOME/Install/nats-server-v2.1.7-linux-arm7
viper: $ export $PATH=$PATH:$HOME/bin

If you wish to keep the nats-server on your path the next time you login, add the export command above to your .bashrc file. Go ahead and repeat the commands above for any additional Pi 4’s or other targets you would like to install the nats-server on. If you’re installing to a PiZero, be sure to use the ARM6 release. The size of the installed nats-server (at the time of this writing) is a little less than 8Mb, which is pretty amazing when you consider the size of other ESB’s.

With the nats-server installed, lets play with some simple messaging API’s to get a sense for how easy it is to do simple things. As is the case with most experiments, well start with the easy things first and add complexity in layers to fit our business needs. As I mentioned earlier, the nats-server documentation is excellent and I recommend your going through it for a better, more thorough understanding of it’s capabilities. We’re going to play with some of that here, but the nitty grtty details are in the docs.

One of the aspects I’ve liked about TIBCO Rendezvous ESB was the simplicity and ease with which you could start a server and exchange subject based messages. These notions of simplicity have carried through into the nats-server.

With subject based messaging we begin by creating an ontology of subjects of interest which best captures our business domains. This concept may be best illustrated with an example.

Example subject namespace

# messages for accounting
ACCOUNTS.BILLABLE.CUSTOMERS
ACCOUNTS.BILLABLE.PARTNERS
ACCOUNTS.PAYABLE.CUSTOMERS
ACCOUNTS.PAYABLE.PARTNERS

MARKETING.CAMPAIGN.CREATE
MARKETING.CAMPAIGN.STATS

PRODUCT.INVENTORY.ITEM.WIDGET.PRICE
PRODUCT.INVENTORY.ITEM.WIDGET.QUANTITY
PRODUCT.INVENTORY.RELOAD

With an ontology of subjects created for our namepace, API’s can express an interest in Publishing to or Subscribing from subjects of interest. Our services can have different qualities assigned depending on the needs of the business. Applications and application users can have differing views of the information by configuring Multi Tenancy into your Accounts.

Lets go ahead and exercise the nats-server we installed earlier with some pub/sub messaging. I’m going to use the Go examples, but you an follow with with an API example that you’re more familiar with. By default, the nats-server can be run with minimal configuration. To be more adaptable to business use cases, you’ll eventually get around to the server configuration file and the command line options. For now, we’ll keep it simple and stick with the default settings. The server runs by default on port 4222.

You’ll need at least 3 shell sessions for the examples, or you can use tmux. We’ll get started by downloading some sample Go client applications, other clients here.

Playing with Pub/Sub

# Download sample client applications using Go
cobra: $ go get github.com/nats-io/nats.go/

# another host
sidewinder: $ go get github.com/nats-io/nats.go/

# start the server on host viper
viper: $ nats-server
[4679] 2020/07/26 15:49:25.319558 [INF] Starting nats-server version 2.1.7
[4679] 2020/07/26 15:49:25.320177 [INF] Git commit [bf0930e]
[4679] 2020/07/26 15:49:25.320765 [INF] Listening for client connections on 0.0.0.0:4222
[4679] 2020/07/26 15:49:25.320832 [INF] Server id is NBMPCVRJHIJ66PFDW5ZS6IVG3W7CGNQV53YIT399243FVWUF5LD7RUJI7PUF
[4679] 2020/07/26 15:49:25.320864 [INF] Server is ready

With the server running on default port 4222, we can send some messages. Messages will be sent as a serialized byte array, commonly they’ll be marshalled from XML or JSON. The examples here will be plaintext. We start by registering a Subscriber on subject lotto.winner.notify and a Publisher will send a message on that same subject.

Send a client message to the nats-server

# subscribe to a subject of interest using example nats client
sidewinder: $ cd $GOPATH/src/github.com/nats-io/nats.go/examples/nats-sub
sidewinder: $ go run main.go -s viper lotto.winner.notify
Listening on [lotto.winner.notify]

# publish a message on subject - lotto.winner.notify
cobra: $ go run main.go -s viper lotto.winner.notify "Congratulations, you won!"
Published [lotto.winner.notify] : 'Congratulations, you won!'

After you Publish the message you should see it arrive in the Subscriber terminal window. Kill the nats-server by sending a SIGTERM, ^C then restart the server with verbose tracing enabled.

# Kill and restart server with verbose tracing
viper: $ ^C
viper: $ nats-server -V

# In the Subscriber terminal watch the disconnect/reconnect
[#1] Received on [lotto.winner.notify]: 'Congratulations, you won!'
Disconnected due to:EOF, will attempt reconnects for 10m
Reconnected [nats://viper:4222]

# In the server observe some ping/ponging
[6537] 2020/07/26 16:07:31.335145 [INF] Starting nats-server version 2.1.7
[6537] 2020/07/26 16:07:31.335927 [INF] Git commit [bf0930e]
[6537] 2020/07/26 16:07:31.336783 [INF] Listening for client connections on 0.0.0.0:4222
[6537] 2020/07/26 16:07:31.336901 [INF] Server id is NA4GNP7LFABC2EUPPSHZEXNEARDUBU5CYKJHEJM77QDH4ZQNG3JWWVGZ
[6537] 2020/07/26 16:07:31.337020 [INF] Server is ready
[6537] 2020/07/26 16:07:31.572089 [TRC] 192.168.1.205:36372 - cid:1 - <<- [CONNECT {"verbose":false,"pedantic":false,"tls_required":false,"name":"NATS Sample Subscriber","lang":"go","version":"1.11.0","protocol":1,"echo":true,"headers":false,"no_responders":false}]
[6537] 2020/07/26 16:07:31.572609 [TRC] 192.168.1.205:36372 - cid:1 - <<- [PING]
[6537] 2020/07/26 16:07:31.572699 [TRC] 192.168.1.205:36372 - cid:1 - ->> [PONG]
[6537] 2020/07/26 16:07:31.575856 [TRC] 192.168.1.205:36372 - cid:1 - <<- [SUB lotto.winner.notify  1]
[6537] 2020/07/26 16:07:31.576197 [TRC] 192.168.1.205:36372 - cid:1 - <<- [PING]
[6537] 2020/07/26 16:07:31.576248 [TRC] 192.168.1.205:36372 - cid:1 - ->> [PONG]
[6537] 2020/07/26 16:07:33.623230 [TRC] 192.168.1.205:36372 - cid:1 - ->> [PING]
[6537] 2020/07/26 16:07:33.626727 [TRC] 192.168.1.205:36372 - cid:1 - <<- [PONG]

There’s a liveness check which goes on between client and server. When the server terminates a client will attempt to reconnect for a predetermined amount of time. A failover strategy allows clients to reattach to another server. Client failures can be handled with strategies as well.

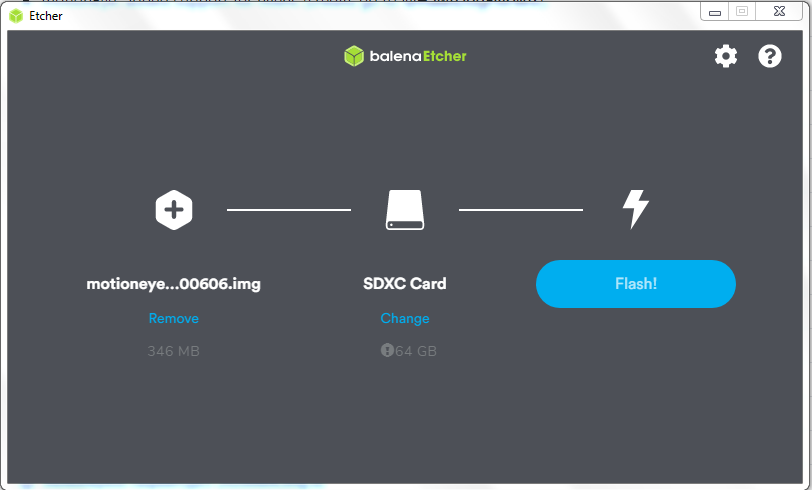
As a final exploration, lets pull the Docker image for the nats-server to a Windows 10 laptop and repeat our pub/sub exercise.

Run the nats-server Docker image

# fetch the nats-server docker image
C:\> docker pull nats
Using default tag: latest
latest: Pulling from library/nats
b509577c0426: Pull complete
61ce65065eb7: Pull complete
Digest: sha256:85589e53092232c686097acfdc3828ac0e20a562d63c5d0f0e7dfceade6fad49
Status: Downloaded newer image for nats:latest
docker.io/library/nats:latest

# Run the Docker container
C:\> docker run --name nats --rm -p 4222:4222 -p 8222:8222 nats
[1] 2020/07/21 06:04:32.534975 [INF] Starting nats-server version 2.1.7
[1] 2020/07/21 06:04:32.534993 [INF] Git commit [bf0930e]
[1] 2020/07/21 06:04:32.535126 [INF] Starting http monitor on 0.0.0.0:8222
[1] 2020/07/21 06:04:32.535157 [INF] Listening for client connections on 0.0.0.0:4222
[1] 2020/07/21 06:04:32.535161 [INF] Server id is NBJ3ACZPYQJE6M4I6KBF4DZSKQMDAI4T6DUOK3JNQ6V4GOVDIZ4G46EH
[1] 2020/07/21 06:04:32.535162 [INF] Server is ready
[1] 2020/07/21 06:04:32.535297 [INF] Listening for route connections on 0.0.0.0:6222

Notice that the container instance exposes the Client port, and HTTP monitor port listening on localhost:8222 and a Route Connections port. Go ahead and view localhost:8222/ in your browser.

Running pub/sub example using Windows 10 Docker Container

# Create subscriber from a target host
sidewinder: $ go run main.go -s 192.168.1.123 lotto.winner.notify
Listening on [lotto.winner.notify]

# Publish a message to the Docker container
cobra: $ go run main.go -s 192.168.1.194 lotto.winner.notify "Congratulations, you won!"

# Verify the message is delivered to the subscriber
[#1] Received on [lotto.winner.notify]: 'Congratulations, you won!'

In a short couple of experiments we explored some basic pub/sub using a standalone and a containerized NATS server. In future posts we may investigate Multi Tenant Accounts, Mutual TLS and Kubernetes solutions. As always keep your questions and comments coming.

Managing Webcams with Motion Eye OS

A home Security Application with lots of features and great potential.

Motion Eye OS and an excellent application for managing your webcams from within your browser. Created by Calin Cristen, it seems to be a labor of love. The project has been on going for over 4 years, it has recent commits totaling nearly 50K, there have been close to 650 contributors at the time of this writing. It’s an open source project, but if you like it consider making a donation.

Motion Eye OS runs on a multitude of target platforms. I’ve got a some Raspberry Pi’s that i’m always looking for fun projects for, so we’ll do just that. In this article i’ll expect you have at least some experience with the Raspberry Pi or installing an OS. If you’re just getting started with the Pi there’s lots of great intro’s on the web that can help get you started. For Pi OS installs, I prefer using the Balena Etcher. It can uncompress images before writing and write multiple simultaneous images and it works great from my windows laptops.

Download the image for your target platform and flash to a micro SD card.

Balena Etcher

If you plan on connecting with Wifi instead of an Ethernet cable be sure to unplug and plug your SSD into your laptop. Use a programmers editor like Nodepad++ to create the wpa_supplicant.conf file in the root directory. The reason for not using Windows Notepad is that it may add some extraneous characters to the file which may fail to be read during boot.

Replace the SSID and PSK with your WiFi id and password. You can also create an empty file called ssh with no file extension in the root directory. The empty ssh file will configure the ssh daemon when you perform a headless boot. The default root user is admin, and there’s no password. With these files created, eject the Micro SD and boot your Raspberry Pi. I found that without the WiFi settings or an Ethernet cable plugged in the boot will panic. Otherwise, note the IP address in the boot and connect from your browser.

wpa_supplicant.conf example

update_config=1
ctrl_interface=/var/run/wpa_supplicant

network={
    ssid="mynet"
    psk="mynet1234"
}

Your initial boot will take some time as Motion Eye OS is configuring storage and system configuration settings. If you’re booting headless you can use the nmap command to find your IP address.

# run nmap to find your IP address i.e.
$ nmap -sn 192.168.1.0/24

In my experiments, I started with an older Pi1 Model B+ which worked fine, but i’ve since moved on to the Pi3 Model B+. The performance of the Quad core processor and 1G RAM is superior to the Pi1. At some point i’ll try a Pi4 Model B with 4G RAM to see if there’s any noticeable improvements.

I also tried the PiZero W, it’s performance is on par with the Pi1. It took a few installs to get it right. The correct image for the Zero is the same as the Pi1, there’s no version number at the end of the image name.

Raspberry Pi's

The nitty gritty details about Motion Eye OS can be found on the Wiki here.

Motion Eye OS has two default accounts, a root Administrative account called admin and a Surveillance account called user. The first thing you should do from the browser interface is to add passwords to these accounts. After you create default passwords for your accounts you can change your TimeZone and add some cameras. In this example i’m using a Raspberry Pi camera and a Logitech HD USB Webcam.

After entering your changes be sure to apply them by clicking the yellow apply button. The user interface it fairly intuitive, you’ll need to play with it a bit to get comfortable. Also in the general Settings you can Shutdown or Reboot your application, Check for application updates and perform Backups.

Under the configuration section for Network you should see the wpa_supplicant settings if you configured your WiFi at boot. Otherwise you can configure your Wifi settings. The services section allows you to choose between FTP, SFTP and Samba (SMB) to alloy you to access Images and Movie files from your Motion Eye OS server. You can also configure to upload your media content to the cloud, synchronizing to your Google Drive.

In the File Storage section, you can change the default location where your media files are stored or choose whether you would like them stored on a network drive. You can also choose whether you would like to invoke an external web hook or execute a Linux command. The Linux command may be a script for calling an API with curl. These capabilities are a bit more advanced, but provide you the capability of getting realtime alerts and providing access to your media from a remote location.

You can control the size of the fonts used for text overlays in the Text Overlay section. Choose where you would like the Camera Name and Timestamp located or create a custom text message. If the font size is too small you can increase it using the slider.

The other sections provide settings which allow you to stream your media, create motion events and schedule when you want your system to be active. Streaming might be a useful Use Case when you have distributed webcams that you might like to interface and control with a lower power PiZero, while streaming motion events to a larger content aggregator.

Streaming is turned off by default, when you enable streaming the default port is 8081. When streaming is enabled you can click the Useful URLs Streaming URL link for the address you can use in Chrome or VLC. In VLC select Media –> Open Network Stream, choose the Network tab and enter your URL. Select the Play button to view the stream.

From this intro I think you’ll agree that Motion Eye OS has a large and rich set of features and capabilities. The best way to learn is to start playing with it. With the number of platforms supported you can get started for under $40 and have a very capable system.

Mutual Authentication with Go

Enable TLS using Self Signed Certificates for your Go Micro Services.

When it comes to securing your applications it’s up to you to understand all the moving parts. In this post we’re going to discuss how to go about adding Mutual Authentication between Client and Server using Go. As a refresher, you may wish to review some of the underlying concepts. Much has been said about these concepts already, so out focus here will be on implementing a solution.

Refresher

We’ll first create a Self Signed Certificate chain using the generate.sh script created by Nicholas Jackson. The script will create for us: Root, Intermediate, Application and Client Certifiates.

Certificates created by generate.sh for domain viper.mynet

.
├── 1_root
│   ├── certs
│   │   └── ca.cert.pem
│   ├── index.txt
│   ├── index.txt.attr
│   ├── index.txt.old
│   ├── newcerts
│   │   └── 100212.pem
│   ├── private
│   │   └── ca.key.pem
│   ├── serial
│   └── serial.old
├── 2_intermediate
│   ├── certs
│   │   ├── ca-chain.cert.pem
│   │   └── intermediate.cert.pem
│   ├── csr
│   │   └── intermediate.csr.pem
│   ├── index.txt
│   ├── index.txt.attr
│   ├── index.txt.attr.old
│   ├── index.txt.old
│   ├── newcerts
│   │   ├── 100212.pem
│   │   └── 100213.pem
│   ├── private
│   │   └── intermediate.key.pem
│   ├── serial
│   └── serial.old
├── 3_application
│   ├── certs
│   │   └── viper.mynet.cert.pem
│   ├── csr
│   │   └── viper.mynet.csr.pem
│   └── private
│       └── viper.mynet.key.pem
├── 4_client
│   ├── certs
│   │   └── viper.mynet.cert.pem
│   ├── csr
│   │   └── viper.mynet.csr.pem
│   └── private
│       └── viper.mynet.key.pem
├── generate.sh
├── intermediate_openssl.cnf
├── LICENSE
├── main.go
├── openssl.cnf
└── README.md

Recall from the refresher above, the Certificate Chain consists of a Root and Intermediate Certifiates. Intermediate Certifiates are used by your Server and are signed by the RootCA. If your Root Certificate were to be compromised, you’d have to reissue certificates for clients. This practice helps to ensure less risk and exposure if something goes wrong.

Certificate Chain
Certificate chain of trust

Each link in the chain is digitally signed to ensure authenticity and to prevent Man In The Middle (MITM) attacks. Certificates cost money, but if you have a production application you’ll need certificates signed by a Root CA or your application won’t be trusted. If you’re trying to understand TLS or if your backend services can be trusted by you, the creator, the self signed certificates we’ll be creating may a viable option.

Once you’ve cloned and changed into the directory containing generate.sh you can create the certificate chain for mutual authentication. In our example we’ll be using two Raspberry Pi4’s in my lab environment, on as Client the other as Server. Change the domain references for your setup accordingly.

My home laboratory consists of several Raspberry Pi’s, but for the sake of this article we’ll be using host viper.mynet as the Server and cobra.mynet as Client.

The sidewinder.mynet host can be another client in the configuration using the client certificate and code.

Lets get started by creating the client and server certificates.

Create your certificates using generate.sh

# run generate.sh providing a domain and a password for the Root key
$ ./generate.sh viper.mynet your-cert-password

With the certificates created, lets create a folder and copy in the client and server certificates we’ll be using.

Copy client and server certificates

# create a dist folder and copy in the certificates
$ mkdir dist

$ cp 2_intermediate/certs/ca-chain.cert.pem dist/serverCrt.pem
$ cp 4_client/certs/viper.mynet.cert.pem dist/clientCrt.pem
$ cp 4_client/private/viper.mynet.key.pem dist/clientKey.pem

Run the server application in main.go

# change the domain to the one you chose when creating the chain
$ go run main.go -domain viper.mynet

# use curl to verify the server is running
$ cd dist
$ curl -v --cacert serverCrt.pem --cert clientCrt.pem --key \
       clientKey.pem https://viper.fios-router.home:8443/

  ...
 Connection state changed (MAX_CONCURRENT_STREAMS == 250)!
< HTTP/2 200
< content-type: text/plain
< content-length: 13
< date: Sun, 12 Jul 2020 18:29:32 GMT
<
mTLS Success

If the mTLS response message looks a littl different from the server code, it’s because I changed the Hello World message and included a line break, otherwise note the 200 success.

You can also copy the certs in the dist folder to another machine and run the same command from remote.

Adding a Go client application

// mTLS client application
package main

import (
        "crypto/tls"
        "crypto/x509"
        "fmt"
        "io/ioutil"
        "log"
        "net/http"
)

func main() {
        var (
                err              error
                cert             tls.Certificate
                serverCert, body []byte
                pool             *x509.CertPool
                tlsConf          *tls.Config
                transport        *http.Transport
                client           *http.Client
                resp             *http.Response
        )
        
        // Reads and parses a public/private key pair from the PEM files
        if cert, err = tls.LoadX509KeyPair("clientCrt.pem", "clientKey.pem"); err != nil {
                log.Fatalln(err)
        }

        // Read the server certifiate
        if serverCert, err = ioutil.ReadFile("serverCrt.pem"); err != nil {
                log.Fatalln(err)
        }

        // Create a new empty certifiate pool then add the server certifiate to the pool
        pool = x509.NewCertPool()
        pool.AppendCertsFromPEM(serverCert)

        tlsConf = &tls.Config{
                Certificates: []tls.Certificate{cert},
                RootCAs:      pool,
        }
        tlsConf.BuildNameToCertificate()

        // Create the client transport
        transport = &http.Transport{
                TLSClientConfig: tlsConf,
        }
        client = &http.Client{
                Transport: transport,
        }

        // Change the address to your server
        if resp, err = client.Get("https://viper.mynet:8443/hello"); err != nil {
                log.Fatalln(err)
        }

        // Check result
        if body, err = ioutil.ReadAll(resp.Body); err != nil {
                log.Fatalln(err)
        }
        defer resp.Body.Close()

        fmt.Printf("mTLS Example Success - %s\n", body)

Run the client application

# run the client
# Be sure to copy over the certifiates in the Server dist to the folder main.go is in
$ go run main.go

# same response as curl, but from your go service

  ...

* Connection state changed (MAX_CONCURRENT_STREAMS == 250)!
< HTTP/2 200
< content-type: text/plain
< content-length: 13
< date: Sun, 12 Jul 2020 18:41:36 GMT
<
mTLS Success

From our examples above you should now be able to construct Go micro services using Mutual Authentication with Self Signed certificates.